Introduction: Understanding 192.168.0.1
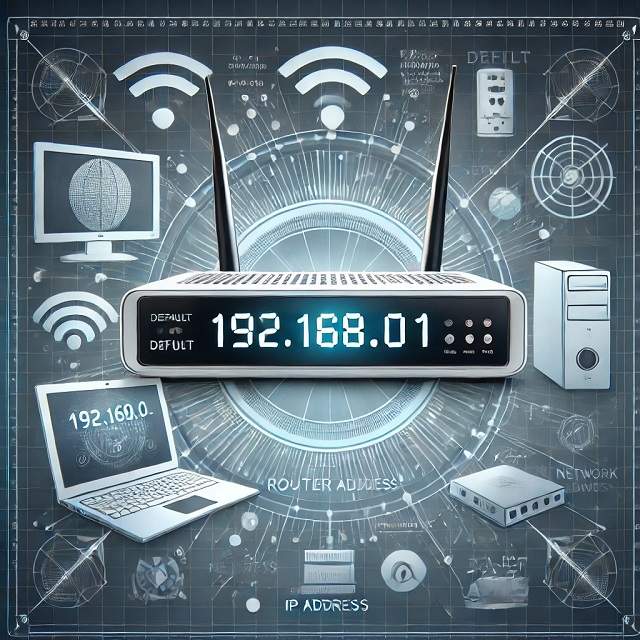
192.168.0.1 is a well-known IP address. It is used by many routers as their default gateway. If you have ever tried setting up a home Wi-Fi network, you have likely encountered this IP. It serves as the address you use to access the router admin panel. At which, you can configure settings such as Wi-Fi passwords, network names, and more.
But why is 192.168.0.1 used so widely? The answer lies in the design of private IP addresses. In home networks, the devices need an IP address to communicate with each other and the Internet.
However, not all IP addresses are public. Some, like 192.168.0.1, are reserved for private use. That means they only work within a local network.
Enter “192.168.0.1” in your browser’s address bar. That directs you to your router’s settings page. This page allows you to manage everything related to your internet connection. You can manage settings from security settings to connected devices.
In most cases, routers from popular manufacturers like D-Link, Netgear, and TP-Link use 192.168.0.1 as their default IP. That makes it one of the most common gateway addresses worldwide.
Understanding 192.168.0.1 is essential for managing a home network. If you are setting up your router for the first time or troubleshooting connection issues, knowing how to access and use 192.168.0.1 gives you full control over your network’s performance and security.
What is 192.168.0.1 and Why It is Important
192.168.0.1 is a private IP address. It is commonly used as the default gateway for many routers. This means it is the address you enter into your web browser when you need to access your router’s settings and make adjustments to your home network.
The reason why it is important is that it acts as a bridge between your devices and the internet. When you connect your phone, laptop, or any other device to your home Wi-Fi, the router assigns each one an IP address. These addresses help the devices communicate with each other within the network and also connect to the internet.
Without 192.168.0.1 (or a similar private IP address), you would not be able to manage your router’s settings. This IP gives you access to crucial features like:
- Changing your Wi-Fi name and password.
- Setting up security features such as firewalls.
- Monitoring devices connected to your network.
Because 192.168.0.1 is a private IP, it is only used within your local network. It is not used on the wider internet. This keeps your network secure, as only devices inside your home can access the router using this IP. This IP address plays a critical role in setting up, managing, and troubleshooting your home Wi-Fi network. That makes it an essential part of your everyday internet experience.
How Does an IP Address Work in a Home Network?
In a home network, an IP address acts as a unique identifier for each device connected to the network. Think of it like a mailing address for your devices. Just as your home address allows mail to reach you, an IP address allows data to find its way to the right device.
There are two main types of IP addresses in a home network. They are private and public. Public IP addresses are what your internet service provider (ISP) assigns to your router to connect to the internet. However, within your home network, each device (like your phone, laptop, or smart TV) gets a private IP address to communicate with the router and each other.
This is where 192.168.0.1 comes in. It is a private IP address assigned to your router. It acts as the “gateway” for all your devices. Your device sends a request to the internet (like opening a website). The router takes that request. The router forwards it through the public IP. And it ensures the right data is sent back to the correct device using its private IP.
Here is a simple breakdown of how an IP address works in a home network:
- Router Assignment: When you connect a device to your home network, the router assigns it a unique private IP address like 192.168.0.2 or 192.168.0.3.
- Device Communication: Devices use these private IP addresses to communicate within the home network (printing documents, file sharing).
- Internet Requests: When a device wants to access the internet, it sends data through the router using the gateway IP. The router then forwards the request using the public IP assigned by the ISP.
- Returning Data: The router ensures the right data returns to the correct device in the network using its private IP.
Devices would not know where to send or receive information without IP addresses. This makes the system of assigning IP addresses. That is crucial for the smooth functioning of your home network.
Why Is 192.168.0.1 the Default IP for Most Routers?
192.168.0.1 is the default IP address for many routers. That is because it belongs to a special range of IP addresses reserved for private networks. These IP ranges set by the Internet Assigned Numbers Authority (IANA) are not used on the public internet. That makes them ideal for local networks like the ones in homes and offices.
Here is why 192.168.0.1 is often chosen as the default IP for routers:
-
Part of the Reserved Private IP Range:
- This IP address falls within the 192.168.x.x range. That is one of the blocks reserved for private network use. This range is commonly used by manufacturers to configure routers without interfering with public IP addresses.
-
Simplicity and Standardization:
- Router manufacturers like D-Link, TP-Link, and Netgear use 192.168.0.1 as a default IP to keep things consistent and simple for users. A standardized IP makes it easier for people to set up and troubleshoot their routers because most users will be familiar with this address.
-
Avoids IP Conflicts:
- Since it is a private IP, it can only be used within a local network. This helps avoid conflicts with public IP addresses. Public IP addresses are needed for devices to communicate across the internet. Using a private IP range ensures that home devices can connect without overlapping with external internet traffic.
-
Legacy Use and Popularity:
- Over time, 192.168.0.1 has become one of the most popular choices among router manufacturers. This widespread use has reinforced its position as the go-to default IP address for home and small office routers. That is creating a sense of familiarity for users.
-
Ease of Configuration:
- By having a standard private IP like 192.168.0.1, users can easily access their router settings by typing this address into their browser. This allows them to manage network settings like Wi-Fi passwords, parental controls, and connected devices without needing specialized knowledge.
In short, 192.168.0.1 is used because it is simple, standardized, and avoids conflicts with public IPs. Its familiarity among both manufacturers and users makes it the default choice for many routers. That provides a smooth and consistent user experience.
The Role of Default IP Addresses in Routers
Default IP addresses play a vital role in helping routers manage and control local networks. These IP addresses are essentially the “entry point” for users to access the router settings and configure network preferences. But their function goes beyond just logging in to change a Wi-Fi password. Here is why default IP addresses are so important in routers:
-
Gateway for Network Management
- The default IP address serves as the gateway for all devices in a local network. When you type this IP address into a browser, you are directed to the router’s admin panel. In the admin panel, you can control every aspect of the network. This includes changing the network’s SSID (Wi-Fi name), updating passwords, setting security protocols, and managing which devices are connected.
-
Simplifies Initial Setup:
- When a router is first set up, the manufacturer assigns a default IP address to make configuration simple. This eliminates the need for complicated software or additional tools. Users just need to enter the IP address into their browser to access and adjust settings right out of the box.
-
Private Network Identification
- Routers use private IP addresses, like 192.168.0.1. That avoids conflicts with public internet addresses. This allows devices in your home to communicate with each other through the router. These private IPs are only recognized within your local network. That makes it easier for the router to direct traffic. It allocates resources between connected devices.
-
Acts as a Gateway for Devices
- Routers need to know where to send traffic within a home network. The default IP address is the starting point for this. It is the central hub through which data is sent and received between the router and connected devices like phones, laptops, and smart TVs. The router uses its default IP to assign unique private IP addresses (like 192.168.0.2, and 192.168.0.3) to each device. That helps to manage traffic efficiently.
-
Troubleshooting and Configuration Access
- Whenever there is an issue with your internet connection, logging into your router via its default IP address is the first step in troubleshooting. Whether it is resetting the router, updating firmware, or checking for intrusions on the network, the default IP (192.168.0.1 in many cases) gives users control over their network settings.
-
Security and Access Control
- Through the default IP, users can configure security settings like firewalls, encryption methods, and network permissions. This helps keep your home network safe from potential threats. Without a default IP securing a network would be far more complicated for the average user.
The default IP address is essential for setting up, managing, and maintaining a home network. It simplifies user access to important router functions. It helps in managing device connections. And it plays a crucial role in troubleshooting and securing the network.
The history behind 192.168.0.1 as a Standard IP
The IP address 192.168.0.1 has become a standard for home routers. But its selection was not random. Its history is rooted in the need for organized and secure Internet communication. That leads to the creation of private IP address ranges. Here is how 192.168.0.1 became the default gateway for most routers:
-
Development of Private IP Addressing
- The concept of private IP addresses emerged in the early days of networking as the number of internet-connected devices grew exponentially. To prevent running out of available IP addresses, a global authority known as the Internet Assigned Numbers Authority (IANA) established specific IP ranges for private internal networks. This included the 192.168.x.x block, of which 192.168.0.1 is a part.
-
Introduction of IPv4 Addressing
- IPv4 (Internet Protocol version 4) was developed in the 1980s. It had a limited number of unique IP addresses. To ensure that businesses, homes, and local networks could connect without using public IP addresses, certain ranges were set aside for local use. The 192.168.x.x range is defined in RFC 1918. That was one of these reserved blocks. And the routers began to adopt addresses like 192.168.0.1 as their default gateway.
-
Manufacturer Adoption
- Router manufacturers sought ways to standardize their products. Many of them opted to use 192.168.0.1 as the default IP for easy setup. Companies like D-Link, Netgear, and TP-Link chose this address because it was part of the private IP range. That makes it suitable for home use without conflicting with external IP addresses. The address also became popular because it was easy to remember and type.
-
Simplification for Home Networks
- When home networking became more common in the 1990s and early 2000s, there was a push to simplify the setup process for average users. Instead of requiring specialized knowledge, manufacturers made it easy to access the router’s settings by assigning 192.168.0.1 as the go-to IP for configuration. This standardization helped non-technical users quickly set up their home networks.
-
Legacy and Widespread Usage
- Over time, 192.168.0.1 became the most recognized default IP address for routers, alongside 192.168.1.1. As more router brands adopted it, this address became ingrained in consumer knowledge. Today, users know that entering 192.168.0.1 into their web browser will take them to the router’s login page, where they can manage network settings.
-
Global Standardization of Private Networks
- The adoption of 192.168.0.1 is not a quirk of history. It reflects a global standard for private networks. It ensures that devices on different networks will not conflict with each other. This standardization supports the smooth operation of local networks worldwide.
192.168.0.1 became a standard IP address due to its inclusion in the reserved private IP range. Its adoption by major router manufacturers made it simple. It is a consistent method for setting up home networks. Today, it remains one of the most recognizable and widely used IP addresses for routers across the globe.
Comparing 192.168.0.1 with Other Common IPs (192.168.1.1, 10.0.0.1)
192.168.0.1 is one of the most common default IP addresses for home routers. Other IPs like 192.168.1.1 and 10.0.0.1 are also widely used. Each of these addresses serves a similar purpose. It is acting as the gateway for routers. However, there are some key differences and similarities worth exploring.
-
192.168.0.1 vs. 192.168.1.1
Both 192.168.0.1 and 192.168.1.1 fall within the same 192.168.x.x private IP address range. That makes them suitable for local area networks (LANs). These addresses are typically used by home routers to provide a default gateway for devices.
-
Similarities:
- Private IP Range: Both addresses are in the 192.168.x.x block, reserved for private networks. That means they are not accessible over the public internet.
- Used for Router Access: Users can type either IP address into their web browser to access their router’s admin settings. That allows them to configure the network.
- Common in Home Networks: These IPs are widely used by router manufacturers like D-Link, TP-Link, Netgear, and Linksys. 192.168.1.1 is often used by Linksys routers. Whereas, 192.168.0.1 is more common for TP-Link and D-Link devices.
-
Differences:
- Default Use by Different Brands: Some brands prefer 192.168.0.1 and others use 192.168.1.1 as their default gateway. This difference in default settings is purely manufacturer preference. And the users can usually change it if needed.
- Router Model Variations: In some cases, even routers from the same manufacturer may use different default IP addresses. For instance, some Netgear models might use 192.168.1.1, while others use 192.168.0.1.
-
192.168.0.1 vs. 10.0.0.1
10.0.0.1 is another private IP address. But it belongs to a different reserved range—the 10.x.x.x range. It is also designated for private networks. This IP address is commonly used by internet service providers (ISPs) and larger networks and router companies like Comcast Xfinity.
-
Similarities:
- Private IP Range: Both 192.168.0.1 and 10.0.0.1 are reserved for private network use. and they won’t appear on the public internet. They serve as local gateways for devices to communicate within the network.
- Router Configuration: Like 192.168.0.1, 10.0.0.1 can be entered in a web browser to access the router’s admin page. It allows users to configure settings like Wi-Fi, parental controls, and security protocols.
-
Differences:
- Larger Address Pool: The 10.x.x.x range is much larger than the 192.168.x.x range. This makes 10.0.0.1 more suitable for larger networks like those used by organizations or ISPs. In contrast, 192.168.0.1 is typically used in smaller home or office networks.
- Brand and Network Scale: 10.0.0.1 is often used by larger ISPs. While 192.168.0.1 is common in consumer-grade routers. You are more likely to encounter 10.0.0.1 in ISP-provided routers from brands like Comcast Xfinity. Whereas, 192.168.0.1 is common in routers bought directly by consumers.
- Network Size: The 192.168.x.x range is well-suited for home networks with fewer devices. In contrast, the 10.x.x.x range can support a much larger number of devices. It makes it ideal for enterprises or large buildings.
-
Which IP Is Better for Home Use?
- 192.168.0.1 and 192.168.1.1 are both excellent choices for home networks. They are part of a smaller private IP range. It is more than sufficient for most homes that typically have fewer than 255 devices connected.
- 10.0.0.1 is usually overkill for home use unless you have a larger setup with numerous devices or are using equipment provided by an ISP. It is more suited to enterprise networks due to its larger range of assignable IPs.
192.168.0.1, 192.168.1.1, and 10.0.0.1 all serve the same fundamental purpose. Yes, they provide a gateway for routers and managing local devices. But each has its own place in the networking world. 192.168.0.1 and 192.168.1.1 are perfect for home networks. They offer simplicity and easy setup. 10.0.0.1, on the other hand, is typically used for larger networks and by ISPs for more expansive configurations.
How to Access 192.168.0.1
Accessing 192.168.0.1 is essential for managing your home network settings. It helps in configuring your router. And it helps in troubleshooting any issues you may encounter. If you prefer to change your Wi-Fi password, adjust parental controls, or update the router firmware, the default IP address 192.168.0.1 serves as the entry point for these tasks.
Here is a step-by-step guide on how to access 192.168.0.1 from your browser:
-
Connect to Your Router
Before accessing 192.168.0.1, ensure that your device is connected to the router’s network. This can be done either via:
- Wi-Fi (connect to your home wireless network)
- Ethernet Cable (plug directly into the router)
If you are not connected to the router, the browser will not be able to communicate with 192.168.0.1.
-
Open a Web Browser
Open any web browser on your device, such as:
- Google Chrome
- Mozilla Firefox
- Microsoft Edge
- Safari
Make sure your browser is up to date for a smoother experience.
-
Type 192.168.0.1 into the Address Bar
In the browser’s address bar (not the search bar), type http://192.168.0.1 and press Enter.
The URL will look like this:
http://192.168.0.1
Make sure there are no extra spaces or characters in the address.
-
Enter Your Router’s Login Credentials
Enter 192.168.0.1. You will be directed to the router’s login page. Here, you will be prompted to enter the admin username and password.
- Default Credentials:
- If you have never changed the login details, they are usually set to the router’s factory defaults. Common default login credentials include:
- Username: admin
- Password: admin or password
- Check the Router Label:
- Many routers have a label on the back or bottom with the default login credentials. If you have not changed the credentials then this label will help.
- Changed Credentials:
- If you or someone else changed the login details then you will need to use the new username and password. If you have forgotten the login credentials, you may need to reset the router to its factory settings.
-
Access the Router’s Admin Settings
After successfully logging in, you will be directed to the router’s administrative settings page. From here, you can configure various options, including:
- Network settings (like SSID and password)
- Parental controls
- Security settings
- Firmware updates
- Port forwarding and other advanced features
You can explore the options carefully. But remember to avoid changing settings you are unfamiliar with unless you are certain of their impact on your network.
-
Log Out After Making Changes
Once you are done with the required configurations, it is a good idea to log out of the router admin page. This helps ensure that others cannot access the settings without your permission. That is especially true if multiple users are on your network.
Troubleshooting Issues When Accessing 192.168.0.1
In some cases, you may encounter problems while trying to access 192.168.0.1. Here are some common issues and how to resolve them:
-
Cannot Access 192.168.0.1
If typing 192.168.0.1 into your browser does not bring up the login page then try these steps:
- Double-check the IP: Make sure you have typed the correct IP address. 192.168.0.1 is a private IP. Therefore, even a small typo will lead to an error.
- Restart the Router: Power off your router. Wait for about 30 seconds. And turn it back on. After it restarts, try accessing 192.168.0.1 again.
- Clear Browser Cache: Sometimes, browser cache can interfere. Clear your cache or try accessing the IP in incognito mode.
- Check Connection: Ensure your device is connected to the correct router. It should be connected either via Wi-Fi or an Ethernet cable.
-
Forgotten Username or Password
If you cannot remember the router’s login credentials:
- Check the Label: Look at the back of the router for default credentials.
- Router Manual: Refer to the router’s manual for the default username and password.
- Factory Reset: If all else fails, you can reset the router to its factory settings by holding the reset button (usually located at the back of the router) for 10-30 seconds. This will erase any custom settings including the username and password.
-
Slow or Unresponsive Router Admin Page
If the router’s admin page is slow to load or unresponsive:
- Reboot the Router: A quick reboot can resolve many connectivity issues.
- Firmware Update: Sometimes, outdated firmware can cause slow performance. After logging in, check for any available updates to the router’s firmware.
-
Check for IP Conflicts
It is possible that your device or network may be using a different default gateway IP address. Here is how you can verify the correct IP address for your router:
- On Windows:
- Press Windows + R, and type cmd. Hit Enter to open the Command Prompt.
- Type ipconfig and press Enter.
- Look for the Default Gateway under your network connection. The IP address listed here is the one you should use (sometimes, it might be different, like 192.168.1.1).
- On macOS:
- Open System Preferences.
- Go to Network and select your active connection.
- Click Advanced and then go to the TCP/IP tab. The Router field will display the correct IP address.
If your router uses a different IP address (192.168.1.1 or 10.0.0.1), use that IP to log in instead of 192.168.0.1.
-
Reset Your Router to Factory Settings
If you have tried all of the above steps and still cannot access 192.168.0.1. You may need to reset your router to its factory default settings. Keep in mind that this will erase any custom settings you have made. That includes your Wi-Fi name (SSID) and password, so proceed with caution.
- How to Reset Your Router:
- Locate the reset button on the back or bottom of the router. It is often a small, recessed button that requires a paperclip or pin to press.
- Press and hold the reset button for 10-30 seconds until the router’s lights blink or change. That indicates a reset.
- After the router reboots, try accessing 192.168.0.1 using the default username and password (found on the router label or in the user manual).
-
Update Router Firmware
Outdated firmware can sometimes cause issues with router functionality. If you are able to log in through other methods (like using another device), check if there is a firmware update available and install it.
- How to Update Router Firmware:
- Log into the router’s admin panel.
- Look for the Firmware Update section (usually under “Administration” or “Advanced”).
- Follow the instructions to update the firmware.
If you cannot log in, you may need to download the firmware update from the router manufacturer’s website and apply it manually.
If you cannot access 192.168.0.1, do not panic. Follow these troubleshooting steps. So that, you will be able to identify the cause and fix the issue, successfully. That will ensure you log into your router’s settings.
Accessing 192.168.0.1 is straightforward and gives you control over your home network settings. Follow the steps outlined here to easily log in, configure your router, and troubleshoot any issues that may arise. 192.168.0.1 remains your gateway to managing your network.
Common Errors When Logging In and How to Fix Them
When trying to log in to 192.168.0.1, several common errors may occur. That ranges from simple typing mistakes to more complex issues with your network or router. Below is a list of the most frequent errors people encounter. We provide step-by-step solutions for fixing them.
-
Wrong IP Address
Entering the wrong IP address is one of the most common mistakes. It can be as simple as a typo. Or your router may use a different default IP address.
How to Fix It:
- Double-check the IP Address: Make sure you are typing 192.168.0.1 exactly as it is. Ensure, you have typed without adding extra characters like “www.” or “https://”.
- Check Default IP: Your router might use another IP like 192.168.1.1 or 10.0.0.1. Look at the back of your router for a label that shows the correct default IP address or refer to the user manual.
- Find the IP Address via Command Prompt:
- On Windows: Open Command Prompt, type ipconfig, and look for the Default Gateway.
- On macOS: Go to System Preferences > Network, select your active connection, click Advanced > TCP/IP, and check the Router field.
-
Forgotten Router Login Credentials
If you have forgotten the username and password for your router then you won’t be able to log in.
How to Fix It:
- Use Default Credentials: Most routers use default login credentials like:
- Username: admin
- Password: admin or password these are usually printed on a sticker on the router.
- Reset the Router: If the default credentials do not work and you have changed them previously, you may need to reset the router to factory settings.
- To reset, press and hold the reset button on the router for 10-30 seconds using a pin or paper clip. This will reset all settings to the default.
-
Browser Issues
Sometimes the problem is not with the router or network but with your web browser. Cached data, old cookies, or outdated browser versions can interfere with logging into 192.168.0.1.
How to Fix It:
- Clear Browser Cache: Go to your browser’s settings. Clear the cache and cookies, then try logging in again.
- Use Incognito Mode: Try accessing 192.168.0.1 in incognito mode or private browsing mode to bypass any stored data that might be causing issues.
- Switch Browsers: If clearing the cache does not work, try logging in using a different browser (switch from Chrome to Firefox or Edge).
-
No Connection to the Router
Check, that your device is not properly connected to the router. If not, you won’t be able to access 192.168.0.1. This can happen if you are using the wrong Wi-Fi network or there is a physical connection issue.
How to Fix It:
- Check Wi-Fi Connection: Make sure your device is connected to the correct Wi-Fi network provided by your router. Avoid connecting to a neighboring or public network.
- Use an Ethernet Cable: For more reliable access, connect your computer directly to the router using an Ethernet cable. This can eliminate any wireless interference or connectivity issues.
- Restart the Router: Power off your router. Wait for about 30 seconds. Turn it back on. This can help fix temporary glitches.
-
Incorrect IP Configuration on Your Device
Sometimes, the device you are using may have an incorrect IP configuration. That can prevent access to 192.168.0.1.
How to Fix It:
- Reset Network Settings: On your device, reset the network settings to automatically obtain an IP address. Here is how:
- On Windows: Go to Network & Internet Settings > Change Adapter Options. Right-click on your network connection. Select Properties. Then select Internet Protocol Version 4 (TCP/IPv4) and choose Obtain an IP address automatically.
- On macOS: Open System Preferences > Network. Click on your active network connection. Then choose Using DHCP from the Configure IPv4 dropdown.
-
Firmware Issues
If the router’s firmware is outdated or corrupt, it might prevent you from accessing the admin page.
How to Fix It:
- Update Firmware: If you can log in via another method, update the router’s firmware through the admin panel. This can usually be done under the Administration or Firmware section of the router settings.
- Factory Reset: If you cannot access the router at all, performing a factory reset will also update the firmware to its default version.
-
Firewall or Antivirus Blocking Access
Your computer’s firewall or antivirus software may prevent access to the router’s IP address for security reasons.
How to Fix It:
- Temporarily Disable Firewall/Antivirus: Disable your firewall or antivirus software temporarily to see if you can access 192.168.0.1. Remember to turn it back on after you have logged in.
- Add the Router IP to the Safe List: If you find that your firewall or antivirus is causing the issue, add 192.168.0.1 to the safe or allowed list in the settings.
-
Router Overheating or Hardware Failure
In rare cases, hardware issues like overheating or damage to the router can prevent you from logging in.
How to Fix It:
- Check for Overheating: Ensure the router is in a well-ventilated area. And it is not overheating. Overheating can cause temporary malfunctions.
- Replace the Router: If you suspect hardware failure and the router is not working after resets, it might be time to replace it.
Facing issues when trying to log into 192.168.0.1 can be frustrating. But most problems are easily fixable with the right approach. These solutions will help you regain access to your router’s admin panel. Always take care when modifying router settings. They are critical to the security and stability of your network.
Router Settings You Can Manage Through 192.168.0.1
Now you have successfully logged into your router’s admin panel. You gain access to various settings that allow you to manage and optimize your home network. Here are the key router settings you can control through it.
-
Wireless Network (Wi-Fi) Settings
You can customize your Wi-Fi network’s name (SSID), password, and security protocols through the router’s dashboard.
- Change SSID: The SSID is your Wi-Fi network’s name. You can modify it to something memorable or unique.
- Update Wi-Fi Password: you can set a strong Wi-Fi password to prevent unauthorized access.
- Configure Security Protocol: Choose the most secure Wi-Fi protocol like WPA3 or WPA2. That can protect your network from hacking attempts.
-
IP Address Configuration
Through the 192.168.0.1 admin page, you can configure how IP addresses are assigned within your network.
- DHCP Settings: Enable or disable Dynamic Host Configuration Protocol (DHCP). DHCP automatically assigns IP addresses to devices on your network.
- Static IP Setup: You can assign fixed IP addresses to specific devices. That is ensuring they always get the same IP when connected.
-
Port Forwarding
Port forwarding is essential if you want to access certain devices, applications, or servers from outside your network. This is commonly used for online gaming, remote security camera access, or hosting websites.
- Open-Specific Ports: You can configure the router to allow external traffic through specific ports. That enhances the accessibility of certain applications.
-
Parental Controls
Many routers offer parental control settings. The parental settings allow you to manage and monitor internet usage for specific devices.
- Restrict Internet Access: Set time limits or block specific websites for certain devices. Restricted internet access ensures children or other users cannot access inappropriate content.
- Monitor Usage: Some routers allow you to track browsing activity or monitor how much data each device uses.
-
Guest Network Setup
Through 192.168.0.1, you can set up a guest network that allows visitors to connect to your Wi-Fi without accessing your main network.
- Create a Separate Wi-Fi Network: Set up a guest network with its own SSID and password to isolate guests from your primary devices.
- Limit Access: You can restrict the guest network’s access to shared files or printers to enhance security.
-
Firewall and Security Settings
Your router’s firewall plays a critical role in protecting your home network from unauthorized access and cyber threats.
- Enable/Disable Firewall: Configure the router’s built-in firewall to block unwanted traffic.
- Set Access Controls: You can limit access to your network based on device MAC addresses. That adds an extra layer of security.
-
Firmware Updates
Keeping your router’s firmware up to date ensures it runs smoothly and remains secure.
- Check for Updates: Through the router’s admin panel, you can manually check for and install firmware updates. That often fixes bugs and improves performance.
-
Quality of Service (QoS) Settings
Quality of Service (QoS) allows you to prioritize certain types of internet traffic. QoS ensures smooth performance for critical applications like streaming, gaming, or video calls.
- Prioritize Devices or Applications: Set bandwidth priorities for devices (like gaming consoles) or applications (like streaming services) to avoid slowdowns during high traffic times.
-
Network Diagnostics
Your router’s admin panel provides tools for troubleshooting network issues.
- Ping and Traceroute: Use these tools to check the connection between your router and the internet. Network diagnostics help you identify network problems.
- Traffic Monitoring: Some routers offer real-time traffic monitoring. Therefore, you can see which devices are consuming the most bandwidth.
-
VPN Setup
If you use a Virtual Private Network (VPN) to secure your online activity, you can often configure it directly through your router.
- VPN Client Setup: You can set up a VPN directly on your router. VPN ensures all devices connected to your network are routed through the VPN for added security.
Managing your router settings allows you to customize, optimize, and secure your home network. Make sure to handle these settings carefully. Improper configurations can lead to connectivity issues or vulnerabilities.
Changing Wi-Fi Name (SSID) and Password
One of the most important tasks in managing your home network through 192.168.0.1 is changing the Wi-Fi name (SSID) and password. This ensures both the security and personalization of your network. Here is a step-by-step guide on how to do it.
Step 1: Log Into Your Router
To access your router’s settings, open a web browser and type 192.168.0.1 into the address bar. Press Enter. This will bring you to the router’s login page.
- Enter Your Username and Password: If you have not changed these, the default login credentials are typically:
- Username: admin
- Password: admin, password, or it may be blank.
If you are unsure, check the router’s label for default credentials or consult the user manual.
Step 2: Navigate to Wireless Settings
Once logged in, find the Wireless Settings section. The exact location may vary depending on your router’s brand and model. But it is usually found under one of these menus:
- Wireless
- Wi-Fi Settings
- Network Settings
Look for a tab or section labeled SSID or Wi-Fi Name.
Step 3: Change the Wi-Fi Name (SSID)
In the SSID field, you will see the current Wi-Fi name. You can change this to anything you like. But avoid using personal information. Pick something unique and memorable.
- Example: Instead of “Linksys123,” you can name it something like “HomeNetwork_5G” or “Techies_Hub.”
Step 4: Update the Wi-Fi Password
Below the SSID, there will be an option to change your Wi-Fi password. The password you set should be strong, using a mix of letters, numbers, and special characters to enhance security.
- Example: Instead of a simple password like “12345678,” use something more secure like “MyWiFi!2024$Secure.”
Most routers will show the password requirements such as a minimum number of characters.
Step 5: Select Security Protocol
Ensure that your router is using the most secure Wi-Fi protocol available. For most modern routers, the recommended protocol is WPA2 or WPA3 for better encryption.
- Security Protocols: Select WPA2-PSK or WPA3-PSK (Personal), as these offer strong protection against hacking attempts.
Step 6: Save Your Changes
After entering your new SSID and password, click Save or Apply to update your router’s settings.
Step 7: Reconnect Devices
Once you change the Wi-Fi name and password, your devices will be disconnected from the network. You will need to reconnect them using the new SSID and password.
- Go to your device’s Wi-Fi settings. Select the new network name, and enter the new password.
Tips for Securing Your Wi-Fi Network
- Use Strong Passwords: Avoid using easily guessable passwords like “password123” or “yourname.” Always combine upper and lowercase letters, numbers, and symbols.
- Hide Your SSID (Optional): Some routers allow you to hide the SSID. That makes your network less visible to others. However, you will need to manually input the SSID and password to connect devices if you choose to hide it.
- Regularly Update Your Password: To ensure ongoing security, consider changing your Wi-Fi password periodically. That too, if you have shared it with guests or others.
Changing the Wi-Fi name (SSID) and password is simple. It is an effective way to personalize and secure your home network. Follow these steps to improve your network’s security. Further, it will reduce the chances of unauthorized access.
Managing Connected Devices and Bandwidth
One of the powerful features accessible via 192.168.0.1 is the ability to manage devices connected to your network and control how bandwidth is allocated. This helps you monitor who is using your Wi-Fi. In addition, helps to prioritize important devices. Thereby, it ensures smooth performance for tasks like streaming and gaming. Here is how to manage connected devices and bandwidth efficiently.
-
Checking Connected Devices
After logging into your router through 192.168.0.1, you can view all the devices currently connected to your network. This allows you to identify any unauthorized users or excessive bandwidth consumption.
Steps to View Connected Devices:
- Step 1: Open a web browser. Type 192.168.0.1. Log in using your router’s credentials.
- Step 2: Navigate to the Device List, Connected Devices, or Network Map section, depending on your router model.
- Step 3: Here, you will see a list of all devices connected to your Wi-Fi. Each device will be identified by its IP address, MAC address, and often its device name.
What to Look For:
- Unauthorized Devices: If you see unknown devices, they might be unauthorized users. In this case, you can change your Wi-Fi password or block the device directly from the admin panel.
- Bandwidth Hogs: Check for devices consuming large amounts of data. That device could slow down your network for other users.
-
Blocking or Limiting Devices
If you identify an unauthorized or unwanted device on your network, or if you want to limit a particular device’s bandwidth, most routers allow you to take action.
Steps to Block or Limit Devices:
- Step 1: In the Connected Devices section, look for an option to block or remove a device. This will prevent it from reconnecting to your Wi-Fi unless the password is changed.
- Step 2: Alternatively, you can set a bandwidth limit for specific devices to ensure they do not consume excessive data. That is particularly useful for shared or congested networks.
Device Blocking Options:
- MAC Address Filtering: Add specific device MAC addresses to a blocklist to prevent them from reconnecting.
- Guest Network Isolation: Use the guest network for visitors. That limits their access and can help manage bandwidth for your main network.
-
Bandwidth Management with Quality of Service (QoS)
Bandwidth management through Quality of Service (QoS) settings allows you to prioritize internet speed for certain devices or applications. This feature ensures that essential activities like streaming, gaming, or video conferencing get the most bandwidth, while less critical tasks (like downloads or web browsing) take lower priority.
How to Set Up QoS:
- Step 1: In your router’s admin panel, look for QoS Settings under Advanced Settings or Traffic Management.
- Step 2: Here, you can assign priority levels to specific devices (like your gaming console or streaming device) or applications (like Netflix or Zoom).
- Step 3: You can often drag devices into high, medium, or low-priority tiers. Devices in the high-priority tier will receive the most bandwidth, even if multiple users are online.
Example Use Cases for QoS:
- Gaming: Prioritize your gaming console to reduce lag and latency. That ensures a smoother experience even if others are browsing the web.
- Video Streaming: Ensure that your smart TV or media player gets more bandwidth for uninterrupted video playback.
- Video Calls: Prioritize video conferencing apps (Zoom or Skype) to maintain call quality. That is during important meetings.
-
Setting Bandwidth Limits for Specific Devices
In addition to QoS, you can manually set bandwidth limits for specific devices. This is useful if certain devices (security cameras or file downloaders) use too much data.
Steps to Set Bandwidth Limits:
- Step 1: In the Traffic Management or Bandwidth Control section, select the device you want to limit.
- Step 2: Set the maximum upload and download speed for that device.
- Step 3: Save the changes, and the router will automatically limit the device’s bandwidth to the specified level.
-
Monitoring Bandwidth Usage
Most modern routers provide real-time bandwidth monitoring tools. that is allowing you to see which devices are using the most data at any given time.
How to Monitor Bandwidth:
- Step 1: Go to the Traffic Monitoring or Bandwidth Monitoring section.
- Step 2: Here, you will see a graph or table showing the real-time upload and download speeds for each device.
- Step 3: You can use this information to identify bandwidth hogs and adjust QoS settings accordingly.
Managing connected devices and bandwidth gives you full control over how your home network operates. You can block unauthorized users, and prioritize important devices with QoS. Further, you can set bandwidth limits also. These can optimize network performance and prevent slowdowns. Keep an eye on bandwidth usage and ensure that your essential devices get the priority for a smoother, faster, and more secure network.
Updating Firmware and Enhancing Security
Keeping your router’s firmware up to date and enhancing its security are two key actions that can greatly improve your network performance. In addition, It safeguards against cyber threats. Through 192.168.0.1, you can easily check for firmware updates and apply advanced security measures to protect your home network. Here is a detailed guide on how to do both.
-
Why Updating Firmware is Important
Router firmware is the software embedded in your router. It controls how it functions. Manufacturers regularly release updates to fix bugs, improve performance, and enhance security. Outdated firmware can make your router vulnerable to security exploits. In addition, it may cause connectivity issues.
Benefits of Updating Firmware:
- Security Patches: They protect your network from known vulnerabilities and hacking attempts.
- Performance Enhancements: It improves speed, stability, and compatibility with newer devices.
- New Features: Sometimes firmware updates introduce new functionalities, like improved parental controls or updated QoS settings.
-
How to Update Your Router’s Firmware
Updating your router’s firmware is a straightforward process. However, it is important to do it carefully to avoid disrupting your network.
Step-by-Step Guide to Updating Firmware:
- Step 1: Open your web browser and type 192.168.0.1 into the address bar to access your router’s admin panel.
- Step 2: Log in with your router’s credentials. If you have not changed them, use the default username and password found on your router’s label.
- Step 3: Navigate to the Administration, Maintenance, or Firmware Update section (depending on your router’s model).
- Step 4: Look for the Firmware Update button. Click it to check if a new version is available.
- Step 5: If an update is available, follow the on-screen instructions to download and install it. The router may reboot automatically after the update.
Important Tips:
- Backup Your Settings: Before updating, it is a good idea to back up your router’s current settings in case something goes wrong during the update process.
- Do Not Interrupt the Update: Avoid turning off the router or disconnecting it from the power supply during the update. That could damage the router.
-
Enhancing Security Through 192.168.0.1
In addition to keeping your firmware updated, you can enhance the security of your network by changing various settings through 192.168.0.1. Here are some essential security steps you can take.
3.1. Enable WPA3 or WPA2 Security Protocol
Your Wi-Fi security protocol plays a crucial role in preventing unauthorized access. Modern routers support WPA3. It is the latest and most secure protocol. If your router does not support WPA3, use WPA2, which is still very secure.
Steps to Enable WPA3/WPA2:
- Step 1: In your router’s settings, go to the Wireless or Wi-Fi Security section.
- Step 2: Under the Security Mode or Encryption option, select WPA3-PSK or WPA2-PSK.
- Step 3: Save the changes to apply the new security mode to your network.
3.2. Disable WPS (Wi-Fi Protected Setup)
Wi-Fi Protected Setup (WPS) is a feature that allows devices to connect to your Wi-Fi network by pressing a button on the router. While convenient, WPS has known security vulnerabilities that hackers can exploit.
Steps to Disable WPS:
- Step 1: In the admin panel, navigate to the Wireless or Wi-Fi Settings section.
- Step 2: Look for WPS Settings and toggle it off.
- Step 3: Save the changes to enhance your network’s security.
3.3. Enable a Guest Network
Setting up a guest network allows visitors to use your Wi-Fi without accessing your main network. This prevents guests from accessing sensitive devices like security cameras or file servers.
Steps to Set Up a Guest Network:
- Step 1: Go to the Guest Network or Wireless Settings section.
- Step 2: Enable the guest network and set a different SSID (network name) and password from your main network.
- Step 3: Set bandwidth limits for the guest network to prevent it from affecting your main network’s performance.
3.4. Disable Remote Management
Remote management allows you to access your router’s settings from outside your home network. However, it can also be a security risk if hackers gain access to it. Unless you absolutely need this feature, it is best to disable it.
Steps to Disable Remote Management:
- Step 1: In the admin panel, find the Remote Management or Remote Access option.
- Step 2: Toggle this option off to ensure that your router settings can only be accessed from within your home network.
-
Regular Security Audits
It is important to regularly audit your router’s security settings. This includes checking for any unfamiliar connected devices, monitoring bandwidth usage, and ensuring that no unauthorized changes have been made to your network settings.
Checklist for Regular Security Audits:
- Ensure that your Wi-Fi password is strong and up to date.
- Check for any unknown devices connected to your network and block them if necessary.
- Make sure the WPA2 or WPA3 security protocol is enabled.
- Review your router’s logs for any suspicious activities.
Regularly update your router’s firmware. That enhances its security. Further, you can protect your home network from cyber threats and ensure smooth performance. Keep your login credentials strong. Enable the latest encryption methods. And disable potentially risky features like WPS and remote management. These are simple but effective steps to safeguard your internet experience.
Advanced Tips for Router Users
We hope you have mastered the basics of router management through 192.168.0.1. There are several advanced tips that can help you optimize your network performance, security, and overall user experience. These advanced tips can make a big difference.
-
Enable QoS (Quality of Service) for Better Bandwidth Allocation
Quality of Service (QoS) allows you to prioritize certain types of internet traffic. QoS ensures that critical applications like video streaming or online gaming receive more bandwidth than less important tasks like file downloads.
How to Enable and Configure QoS:
- Step 1: Log into 192.168.0.1. Navigate to the Advanced Settings or Quality of Service section.
- Step 2: Enable QoS, if not already active.
- Step 3: Assign priority levels (high, medium, low) to specific devices or applications. Prioritize streaming devices like smart TVs or gaming consoles.
- Step 4: Save the changes to ensure optimal bandwidth distribution.
-
Create a Separate Network for IoT Devices
Internet of Things (IoT) devices like smart thermostats, lights, and cameras, often lack robust security features. Set up a separate network specifically for these devices. So that, you can isolate them from your main network. That can reduce the risk of cyber threats.
Steps to Create a Separate Network for IoT Devices:
- Step 1: Log in and go to the Network Settings or Guest Network section.
- Step 2: Enable a new network and label it appropriately, like “IoT Network.”
- Step 3: Set a different password for this network and keep it separate from your primary SSID.
- Step 4: Connect all your IoT devices to this new network.
By isolating your IoT devices, you can reduce vulnerabilities and ensure your primary devices stay protected.
-
Utilize Parental Controls to Manage Usage
Most modern routers have built-in parental controls. Parental control allows you to manage internet access for different users, devices, or specific content. This feature is especially useful if you have children or want to limit access to certain sites.
Steps to Set Up Parental Controls:
- Step 1: After accessing your router’s admin panel, look for the Parental Controls or Access Restrictions section.
- Step 2: Set rules for specific devices like time limits or blocked websites.
- Step 3: You can also schedule internet downtime for certain users, like limiting usage during homework hours.
- Step 4: Save the settings to enforce your controls.
Parental controls provide peace of mind. And it ensures safe and controlled internet access.
-
Set Up a VPN Directly on Your Router
For enhanced privacy and security configure a Virtual Private Network (VPN) on your router. It helps you instead of installing a VPN app on each individual device. This ensures that all internet traffic from devices connected to the router is encrypted. It improves privacy across the entire network.
Steps to Configure VPN on Your Router:
- Step 1: Log into 192.168.0.1 and find the VPN Settings or Security section.
- Step 2: Input the VPN credentials provided by your VPN service provider.
- Step 3: Enable VPN for all traffic, ensuring that every device connected to the router uses the encrypted connection.
- Step 4: Save the settings and restart your router to activate the VPN.
Using a router-level VPN is an excellent way to protect all your internet-connected devices at once.
-
Fine-Tune Wireless Channels for Improved Signal Strength
Interference from other wireless networks in densely populated areas degrades your Wi-Fi signal. Manually selecting the optimal wireless channel for your router can help mitigate interference and boost signal strength.
How to Fine-Tune Wireless Channels:
- Step 1: Use a Wi-Fi analyzer tool to check which channels are least congested in your area.
- Step 2: Log into 192.168.0.1 and go to the Wireless Settings or Advanced Wi-Fi Settings.
- Step 3: Manually select a channel that is less crowded. That is typically channels 1, 6, or 11 for 2.4GHz networks or higher channels for 5GHz networks.
- Step 4: Save the settings and monitor for signal improvement.
Selecting the best wireless channel can significantly enhance your network’s performance, if you experience slowdowns due to interference.
-
Enable MAC Address Filtering for Added Security
MAC (Media Access Control) address filtering allows you to control which devices can connect to your network. Each device has a unique MAC address. Create a whitelist of approved devices and block unauthorized devices from accessing your network.
Steps to Enable MAC Address Filtering:
- Step 1: Log into 192.168.0.1 and navigate to the Security or Wireless Settings section.
- Step 2: Find the MAC Address Filtering option and enable it.
- Step 3: Add the MAC addresses of your trusted devices to the whitelist.
- Step 4: Save the changes and only the devices with approved MAC addresses will be able to connect.
MAC address filtering adds an extra layer of security to your network. It should be used in conjunction with strong encryption methods like WPA3.
-
Adjust Signal Power for Better Coverage
If you experience weak Wi-Fi signals in certain areas of your home, or if you want to limit the range of your Wi-Fi to enhance security, adjusting the signal power can help.
Steps to Adjust Signal Power:
- Step 1: In 192.168.0.1, go to the Advanced Wireless Settings or Transmit Power section.
- Step 2: Increase or decrease the signal power based on your needs. For wider coverage, increase the power. For more localized, secure access, decrease it.
- Step 3: Save the settings and test the signal strength.
Fine-tuning your signal power can improve Wi-Fi coverage. Further, it reduces the chances of external interference.
-
Enable Network Traffic Monitoring
Monitoring your network traffic can provide insights into how your bandwidth is being used. It helps identify potential security threats or bandwidth hogs.
How to Enable Traffic Monitoring:
- Step 1: In your router’s settings, navigate to the Traffic Monitoring or Bandwidth Usage section.
- Step 2: Enable real-time monitoring to see which devices or applications are consuming the most bandwidth.
- Step 3: Use this data to adjust QoS settings or take action if unauthorized devices are using your network.
Monitoring your network can help you troubleshoot issues. Besides, it ensures your bandwidth is being used efficiently.
Advanced router users can optimize their network in a variety of ways by accessing 192.168.0.1. You can enable QoS and create separate networks for IoT devices. Further, you can set up VPNs and fine-tuning wireless channels. These advanced tips can enhance performance and security. In addition, these tips will help you make the most of your router.
How to Change the Default IP Address of Your Router
Changing the default IP address of your router can enhance network security. Further, it helps avoid IP conflicts. That is especially true in environments with multiple routers. The process is simple and can be done through the router’s admin panel. That is usually accessed. Here is a step-by-step guide to changing the default IP address of your router.
Step 1: Log Into Your Router’s Admin Panel
To change the IP address, you will first need to access the router settings.
- Open your web browser: Enter 192.168.0.1 in the address bar.
- Log in: Use your admin credentials (username and password). These are usually printed on the router or provided by your Internet Service Provider (ISP). If you have not changed them, the default credentials are often “admin” for both fields.
Step 2: Navigate to the LAN Settings
Once logged in, you will need to locate the LAN (Local Area Network) settings.
- Look for the LAN or Network Settings section in the router’s menu.
- In this section, you will find the current IP address. That is likely set to 192.168.0.1.
Step 3: Change the Default IP Address
Now that you are in the LAN settings, you can change the IP address.
- Choose a new IP address: You can change the IP to another common private IP, like 192.168.1.1 or 10.0.0.1. Just make sure it is an address in the private IP range (192.168.x.x or 10.x.x.x).
- Avoid IP conflicts: Make sure the new IP address does not conflict with other devices on your network.
Step 4: Save the Changes
After entering the new IP address do not forget to save the settings.
- Click “Apply” or “Save”: This will change the default IP address.
- The router will typically reboot automatically for the changes to take effect. You may temporarily lose internet access during this process.
Step 5: Reconnect to the Router
Once the router reboots with the new IP address, you will need to reconnect.
- Enter the new IP address in your browser’s address bar (192.168.1.1).
- Log in again using your admin credentials to verify that the change was successful.
Troubleshooting Tips
- Forgot the new IP address?: If you cannot remember the new IP, you can reset your router to its factory settings to revert back to 192.168.0.1.
- Check IP conflicts: If you experience network issues after changing the IP, check other devices to ensure there is no IP conflict with the new address.
Why Change the Default IP Address?
Changing the default IP address of your router offers several benefits:
- Enhanced Security: Since many routers use the same default IP (like 192.168.0.1), changing it can help prevent unauthorized access by making it less predictable.
- Avoid IP Conflicts: In environments with multiple routers, having different default IP addresses prevents conflicts between routers.
- Network Customization: Advanced users may want to customize their network. And changing the router’s IP address is a good step toward managing a more complex home network.
Follow these steps to change the default IP address of your router to improve security and network performance. If you encounter any difficulties, consult your router’s manual or reach out to your ISP for support.
The Importance of Changing Default Login Credentials
When you first set up your router, it likely comes with a default username and password, like “admin” for both fields. This makes the initial setup easier. Keeping these default login credentials can pose serious security risks to your home network. Understanding the importance of changing these credentials can help protect your network from unauthorized access and potential data breaches.
-
Prevent Unauthorized Access
The default login credentials for most routers are well-known and publicly available. Hackers and malicious users can easily look up the default username and password for your specific router model. If you do not change these credentials, anyone with access to your Wi-Fi network could log in to your router’s admin panel. That potentially takes control of your entire network.
Changing the default credentials ensures that only authorized users can access your router settings through the IP address 192.168.0.1. This simple step is a crucial barrier against unauthorized access.
-
Protect Sensitive Information
Routers control many aspects of your network. It connects devices, allocates bandwidth, and manages Wi-Fi settings. If a hacker gains access using default login credentials, they could:
- Monitor network traffic: This could expose sensitive information like login details, financial data, or personal messages.
- Change settings: Hackers could modify your network’s settings. That leaves you vulnerable to further attacks or cutting off your internet access.
- Install malicious software: Some attackers might install malware or redirect your traffic to malicious sites.
Changing the default username and password limits the chance of your sensitive data being exposed.
-
Strengthen Your Network Security
Your router is the first line of defense for your home network. A weak point here can compromise the entire network. Someone can access your router settings using the default login credentials. And they could disable security features and leave your network open to attacks such as:
- Wi-Fi eavesdropping: Without proper encryption, outsiders can monitor your Wi-Fi traffic.
- Man-in-the-middle attacks: Hackers could intercept communications between your devices and external servers. They can steal or manipulate information.
- Device hijacking: Connected devices like smart home gadgets could be controlled remotely by unauthorized users.
Changing your router’s default login details adds an extra layer of protection to your network. It helps to keep all connected devices secure.
-
Reduce the Risk of Botnet Attacks
A growing concern in cybersecurity is the rise of botnets. Botnets are the networks of infected devices controlled by attackers. Routers with default login credentials are easy targets for these attackers. Once compromised, your router can be used in large-scale cyberattacks without your knowledge.
Secure your router with a strong, unique password. So, you make your router much harder for attackers to add your device to a botnet.
-
Easy to Implement, Effective Protection
Changing the default login credentials is one of the simplest steps you can take to improve your network security. It requires only a few minutes of your time but can prevent significant issues down the road. Here is how you can do it:
- Log into your router: Open a browser and enter 192.168.0.1 in the address bar.
- Go to the settings page: Find the section for changing the admin username and password (often found under “Administration” or “System”).
- Create a strong password: Use a unique password that combines letters, numbers, and symbols. Avoid using easily guessable information like birthdays or common phrases.
- Save your changes: Once you have updated the credentials, log out of the router settings.
Keep Your Network Safe
The default IP address 192.168.0.1 is just the starting point for securing your router. However, changing the default login credentials is one of the most crucial steps to safeguarding your home network. By doing this, you can protect your sensitive information. It reduces the risk of attacks. Further, it maintains a secure, well-functioning network.
How to Reset Router Settings Safely
Resetting your router can be a useful solution for various network issues. It helps you to resolve the issues like forgotten passwords or persistent connectivity problems. However, it is important to know how to reset your router safely to avoid losing critical configurations or causing additional issues. Here is a step-by-step guide on how to reset your router settings safely.
-
Understand the Impact of a Reset
Before you proceed with a reset, it is important to understand what it entails:
- Factory Reset: This option restores your router to its original settings. Further, it erases all customized configurations like Wi-Fi name (SSID), password, and any special settings you may have applied.
- Partial Reset: Some routers offer the option to reset specific settings without affecting others. This can be useful for troubleshooting certain issues.
Make sure you know which type of reset you want to perform. You be prepared for the consequences.
-
Back Up Your Current Settings
To avoid losing important configurations, it is a good idea to back up your current router settings before resetting. Most routers have a feature that allows you to save your settings. Here is how to do it:
- Log into your router: Open a browser and enter 192.168.0.1 in the address bar.
- Access the settings: Navigate to the Administration or Settings section.
- Find the backup option: Look for a button or link that allows you to save your current settings to a file.
- Save the file: Download the backup file to a secure location on your computer.
This step ensures you can restore your settings if needed.
-
Prepare for the Reset
Before resetting your router, ensure that you have:
- A physical connection: If possible, connect your computer directly to the router using an Ethernet cable. This ensures a stable connection during the reset process.
- Access to your ISP information: After a factory reset, you may need to re-enter your ISP settings. Make sure you have any required information (like PPPoE credentials) handy.
-
Reset the Router
There are two main methods to reset your router:
Method 1: Using the Reset Button
- Locate the reset button: This is typically a small, recessed button on the back of the router. You may need a paperclip or pin to press it.
- Press and hold the button: Use the paperclip to hold down the reset button for about 10-15 seconds. You will notice the router lights will flash. That indicates the reset is in progress.
- Release the button: After holding it down, release the button. The router will restart. All settings will revert to factory defaults.
Method 2: Resetting via the Admin Interface
- Log into your router: Enter 192.168.0.1 in your web browser.
- Navigate to settings: Find the option for resetting the router. That is usually located under Administration or System settings.
- Confirm the reset: Follow the prompts to confirm that you want to reset the router. The router will restart automatically.
-
Reconfigure Your Router
After the reset, you will need to reconfigure your router settings:
- Log in with default credentials: Use the default username and password (usually found on the router or in the manual).
- Restore backup settings: If you backed up your settings earlier, look for the option to upload that file and restore your previous configurations.
- Set up Wi-Fi and security: If you did not restore settings, manually set up your Wi-Fi name (SSID) and password. Also, make sure to change the default login credentials for added security.
-
Test Your Connection
After reconfiguring your router:
- Connect your devices: Ensure that your devices can connect to the network using the new Wi-Fi settings.
- Check internet access: Test your internet connection to confirm everything is functioning correctly.
-
Troubleshooting Tips
If you encounter issues after resetting your router:
- Double-check configurations: Make sure you entered all settings correctly, including any ISP-required information.
- Reconnect devices: Sometimes devices may not connect automatically. If so, try forgetting the network and reconnecting.
- Contact your ISP: If problems persist, your Internet Service Provider may offer assistance or specific settings required for your connection.
Reset with Confidence
Resetting your router settings can resolve many connectivity issues and help start fresh. Following these steps can safely reset your router without losing important configurations. That will ensure a smooth and secure network experience.
Conclusion: Mastering Your Home Network with 192.168.0.1
Understanding how to navigate and manage your home network is essential for maintaining a secure and efficient online environment. The IP address 192.168.0.1 plays a crucial role in this process. It is serving as the gateway to your router’s settings. Familiarizing yourself with this address and its significance helps you to control your network.
Encouragement to Regularly Update Router Settings for Security
One of the most important practices in managing your home network is to regularly update your router settings. Cybersecurity threats are constantly evolving. And your router is a key entry point to your home network. Here are some steps to keep in mind:
- Change Default Credentials: Always change the default username and password to something unique and strong. This is your first line of defense against unauthorized access.
- Update Firmware: Regularly check for firmware updates available for your router. These updates often contain security patches that protect against vulnerabilities.
- Review Connected Devices: Periodically check which devices are connected to your network. Remove any unfamiliar devices to maintain network integrity.
- Adjust Security Settings: Ensure that you are using strong encryption (like WPA3) for your Wi-Fi. Disable features like WPS that can be exploited.
Take these proactive measures to enhance your home network’s security. It also ensures a smoother online experience for all your devices.
Final Thoughts on Why 192.168.0.1 is Key for Home Networks
In conclusion, 192.168.0.1 is more than just a number. It is a gateway to managing and optimizing your home network. Understanding how to access and utilize this IP address is vital.
Remember, a well-managed network protects your personal data. And it also enhances the performance of all your connected devices.
Follow the guidelines outlined in this blog post. That will help you to navigate your router settings confidently and take charge of your home network’s security and functionality. Embrace the knowledge and make the most of your home network today!
Frequently Asked Questions:
-
What is 192.168.0.1?
192.168.0.1 is a private IP address. It is commonly used as the default gateway for many home routers. It allows users to access the router’s admin interface to configure settings and manage connected devices. It enhances network security.
-
How do I access 192.168.0.1?
To access 192.168.0.1, open a web browser and type the address into the address bar. Press Enter and you will be prompted to enter your router’s login credentials (username and password).
-
What if I cannot access 192.168.0.1?
If you cannot access 192.168.0.1, check your network connection to ensure your device is connected to the router. You can also try using a different browser or device. If the issue persists, consider resetting your router to factory settings.
-
What should I do if I forget my router’s login credentials?
If you forget your router’s login credentials, you may need to reset the router to factory settings. This will erase all custom configurations. After resetting, you can use the default username and password provided in the router’s manual or on the device itself.
-
Why is 192.168.0.1 the default IP address for many routers?
192.168.0.1 is part of the private IP address range designated by the Internet Assigned Numbers Authority (IANA) for use in local networks. Many manufacturers choose this address as the default because it is easy to remember and prevents conflicts with public IP addresses.
-
Can I change the default IP address of my router?
Yes, you can change the default IP address of your router. Log in to your router’s admin interface. Navigate to the network settings. And look for the option to change the LAN IP address. Be sure to choose a valid private IP address range.
-
What are the common errors when logging into 192.168.0.1?
Common errors include incorrect login credentials, connection issues, or the router being configured to a different IP address. If you encounter errors, verify your connection. And ensure you are using the correct username and password.
-
How often should I update my router’s firmware?
It is advisable to check for firmware updates at least once every few months or whenever you notice issues with your network. Keeping your firmware up to date enhances security and may improve performance.
-
What security measures should I take when using 192.168.0.1?
To enhance security when using 192.168.0.1:
- Change the default login credentials.
- Enable WPA3 or WPA2 encryption for your Wi-Fi.
- Regularly update your router’s firmware.
- Disable features like WPS that may pose security risks.
-
Can I use 192.168.0.1 with any router?
Not all routers use it as their default IP address, but many do. Other common default IP addresses include 192.168.1.1 and 10.0.0.1. Check your router’s documentation or label to confirm its default IP address.
What is RFC 1918?
RFC 1918, titled “Address Allocation for Private Internets,” is a specification published by the Internet Engineering Task Force. It defines a set of IP address ranges reserved for private use within local networks. These addresses are not routable on the public internet. It means that devices using these addresses cannot be reached from outside their local network. The primary purpose of RFC 1918 is to allow organizations to create their own private networks without conflicting with public IP address allocations.
Key Points of RFC 1918:
- Private IP Address Ranges: RFC 1918 specifies three blocks of IP addresses that can be used for private networks:
- 10.0.0.0 to 10.255.255.255 (10.0.0.0/8)
- 172.16.0.0 to 172.31.255.255 (172.16.0.0/12)
- 192.168.0.0 to 192.168.255.255 (192.168.0.0/16)
- Non-Routability: Addresses defined in RFC 1918 are meant to be used within a local network. Routers on the internet are configured to ignore these addresses.
- NAT (Network Address Translation): It is to enable devices with private IP addresses to access the internet, organizations typically use NAT. NAT allows multiple devices on a private network to share a single public IP address. It translates private addresses to a public address when communicating with external networks.
- Use Cases: RFC 1918 addresses are commonly used in home networks and corporate networks.
- Impact on Network Design: The specification has influenced how network engineers design and implement local networks. Further, it promotes the efficient use of IP addresses and enhances security by isolating private networks from the public internet.