Introduction: Why Connecting HDMI is Important
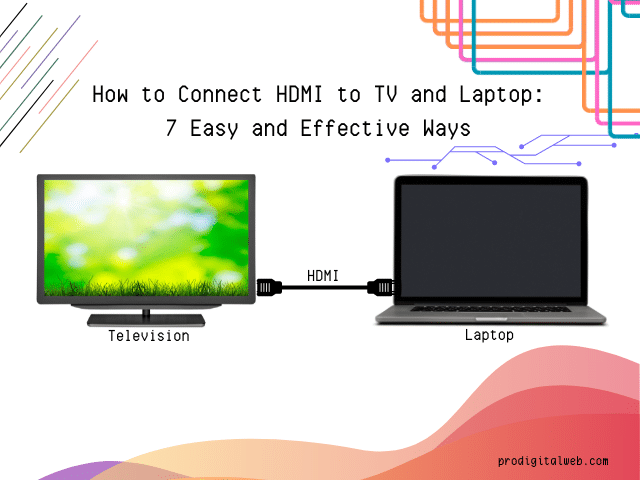
In this ProDigitalWeb guide, we will walk you through how to connect HDMI to TV and laptop for seamless media streaming, gaming, or presentations. Connecting your laptop to a TV using an HDMI cable is one of the easiest ways to enjoy high-quality video and audio on a larger screen.
HDMI (High-Definition Multimedia Interface) has become the standard for transmitting high-quality video and audio between devices today. Whether you are setting up a home entertainment system or making a professional presentation, HDMI offers a seamless way to connect your laptop to your TV. HDMI ensures crystal-clear visuals and superior sound.
The importance of HDMI lies in its ability to transfer uncompressed digital signals. It allows for better picture resolution and sound clarity compared to older analog connections. This makes it ideal for streaming movies, gaming, or even extending your laptop’s display for more productive multitasking.
Furthermore, HDMI simplifies connectivity. With just one cable, you can transmit both audio and video. High-Definition Multimedia Interface reduces the need for multiple cords. It is a universal solution compatible with most modern TVs, laptops, and other devices. That makes it an essential tool for anyone looking to enhance their digital experiences.
In short, connecting HDMI is important for ensuring high-quality performance. And it facilitates ease of use in both personal and professional settings.
What is HDMI?
HDMI or High-Definition Multimedia Interface is a widely-used standard for transmitting digital video and audio between devices. It was introduced in 2003 as a solution to the growing need for a single cable solution. It comes with high-quality cable that could handle both audio and video signals. It eliminates the need for separate connections.
An HDMI cable connects devices like laptops, TVs, gaming consoles, and monitor. It allows them to share high-definition video, from 720p to 4K and beyond, along with surround sound audio formats. The beauty of HDMI lies in its simplicity. Just one HDMI cable can handle both tasks. That makes it a cleaner and more efficient option compared to older analog systems like VGA and RCA.
HDMI comes in different versions like HDMI 1.4, 2.0. And the latest version is 2.1. Each one offers improvements in bandwidth and support for higher resolutions, refresh rates, and features like HDR (High Dynamic Range). This adaptability has made HDMI the go-to connection for everything. People are using it for various purposes from watching movies in Ultra HD to delivering smooth to high-frame-rate gaming experiences.
Whether you are connecting your laptop to a TV or a game console to a projector, HDMI is the universal solution that ensures high-quality output and an easy setup.
The Benefits of Using HDMI for Connecting Devices
HDMI has become the gold standard for connecting devices like TVs, laptops, gaming consoles, and projectors. That is due to its numerous advantages. Here are some key benefits of using HDMI:-
-
High-Quality Video and Audio Transmission
HDMI provides uncompressed digital video and audio. It ensures that you get the best possible picture and sound. Whether it is streaming movies, playing video games, or giving a presentation, HDMI delivers resolutions up to 4K and beyond. Along with it, it support for high-quality audio formats like Dolby Digital and DTS. This leads to sharp visuals and immersive sound. These features make your entertainment or work experience much more enjoyable.
-
One Cable, Two Functions
One of the biggest advantages of HDMI is that it carries both video and audio signals in a single cable. This simplifies the connection process. Besides, it reduces cable clutter around your entertainment setup. In older analog systems separate cables were required for audio and video. But HDMI streamlines your connections with single cable. That makes it easier to set up and manage.
-
Universal Compatibility
HDMI is supported by most modern devices, from TVs and laptops to soundbars and gaming consoles. This universality means that you can use the same HDMI cable across different devices. That ensures a hassle-free experience. Whether you are upgrading your TV or switching between devices, HDMI’s wide compatibility makes it an easy choice for connecting everything.
-
Supports Advanced Features
Modern HDMI versions, such as HDMI 2.0 and HDMI 2.1, come with advanced features like HDR (High Dynamic Range). That enhances contrast and color for a more vivid viewing experience. They also support higher refresh rates. Higher refresh rates is crucial for gamers who need smooth, lag-free performance. HDMI 2.1 even supports up to 8K resolution. It is a future-proofing for your setup for years to come.
-
Ease of Use and Convenience
HDMI connections are plug-and-play. That means you can easily connect your devices without needing any special configuration or technical knowledge. As long as your device has an HDMI port, you can simply plug in the cable. In addition, you need to select the correct input, and start enjoying your media.
-
Secure, Reliable Connection
HDMI cables are designed to provide a stable and secure connection. These cables reduce the risk of signal interference or degradation. This ensures that your audio and video output remains consistent, with no flickering, static, or interruptions.
HDMI is the ideal solution for connecting modern devices. It offers superior video and audio quality, ease of use, and broad compatibility. Whether for entertainment or productivity, HDMI enhances the overall experience by simplifying connections. In addition, it delivers high-performance output.
Step-by-Step Guide to Connecting HDMI to TV and Laptop
Connecting your laptop to a TV using an HDMI cable is one of the simplest ways to extend or mirror your laptop’s screen on a larger display. This guide will take you through each step in detail. This guide on “How to connect HDMI to TV and Laptop” ensures that you can enjoy a hassle-free connection with high-quality video and audio.
Step 1: Check HDMI Ports on Your Devices
Before you start, it is essential to ensure that both your laptop and TV have HDMI ports. The HDMI port is typically a flat, wide port labeled “HDMI” on most modern devices.
- For Laptops: Many laptops, especially older models, come with standard HDMI ports. However, newer laptops (ultra-thin models) may have a USB-C or mini-HDMI port instead. If your laptop has one of these, you will need an adapter. The adapter may vary such as a USB-C to HDMI or mini-HDMI to HDMI to make the connection.
- For TVs: Most modern TVs have at least one HDMI port. It is typically located on the back or side. In some cases, TVs may have multiple HDMI inputs (HDMI 1, HDMI 2, etc.). It is important to note which port you are using. Since, you will need to switch to this specific input when you are ready to view the content.
Take a moment to inspect both devices. Confirm that they have the required ports. And determine if an adapter is necessary before proceeding.
Step 2: Select the Right HDMI Cable
The next step is to choose the correct HDMI cable for your setup. HDMI cables come in several types. But for most general purposes, a standard HDMI cable will suffice. If you are looking for high-quality video and audio (1080p, 4K, or 8K resolutions) then you will need a cable that can handle those demands.
- Types of HDMI Cables:
- Standard HDMI Cable: Supports resolutions up to 1080p. It is perfect for basic HD streaming or gaming.
- High-Speed HDMI Cable: Supports resolutions up to 4K and 3D video. It is a great option for modern TVs and high-resolution content.
- Ultra-High-Speed HDMI Cable: Supports 4K, 8K, and HDR content with higher frame rates and more bandwidth. These are ideal for top-tier gaming systems, high-end TVs, or professional display setups.
Ensure that your cable is long enough to comfortably connect your laptop to the TV without putting stress on the ports or on the cable itself.
Step 3: Connect the Laptop to the TV via HDMI
Once you have your HDMI cable, you can begin the physical connection process:
- Plug one end of the HDMI cable into your laptop: Locate the HDMI port (or use your adapter if needed) and insert the cable. Ensure the cable is firmly inserted. Loose connections can cause issues with signal transmission, so fix it firmly.
- Plug the other end into the TV: On your TV, find an available HDMI port and connect the other end of the cable. Make a note of which HDMI port you are using, if your TV has multiple ports. This will be important in the next step when you switch to the correct input.
At this stage, your laptop should be physically connected to the TV. But you will not see anything on the TV screen yet.
Step 4: Switching to HDMI Input on the TV
After making the physical connection, you need to tell your TV to display the input from the HDMI port you just connected to:
- Turn on the TV: If it is not already powered on, switch it on and get your remote ready.
- Access the input or source menu: On most TVs, you can switch inputs using the Input or Source button on your TV remote. Press this button to bring up a list of available inputs. That will likely include your HDMI ports (HDMI 1, HDMI 2, etc.).
- Select the correct HDMI port: Using your remote, scroll through the available inputs until you find the HDMI port you used. Select this port and your TV should now display your laptop screen.
If you do not see anything on the TV yet, move to the next step to adjust your laptop’s display settings.
Step 5: Adjusting Display Settings on Your Laptop
Sometimes, your laptop won’t automatically detect the TV, or you might need to adjust the way the display is shared. You have the option to mirror your laptop’s screen on the TV. Extend it to use the TV as a second screen, or display only on the TV. Here is how to adjust these settings:
- For Windows:
- Right-click on the desktop and select Display settings.
- Scroll down to the section labeled Multiple displays. Here, you will see different options for how you want to use the TV.
- Duplicate: This option mirrors your laptop’s screen on the TV. It will display the same content on both screens.
- Extend: This option extends your display. It allows you to use your laptop and TV as separate screens (perfect for multitasking).
- Second screen only: This option turns off your laptop’s display and shows content only on the TV.
- Select your preferred option and click Apply.
- For macOS:
- Click on the Apple menu and go to System Preferences.
- Select Displays and click on the Arrangement tab.
- Here, you can mirror your Mac’s screen or extend the display by dragging the screen icons to arrange the two screens.
Your laptop’s display should now appear on the TV. You can adjust the resolution and orientation further in the display settings if needed.
Step 6: Adjusting Audio Output (Optional)
By default, your laptop’s audio may still play through its built-in speakers. To ensure the audio plays through your TV’s speakers, you need to adjust the audio output settings:
- For Windows:
- Right-click on the speaker icon in the bottom-right corner of the taskbar.
- Select Playback devices or Open sound settings.
- In the list of available playback devices, select your TV (it may be labeled with the HDMI port or the TV model).
- Click Set as Default and hit Apply. That will ensure the sound now comes from your TV.
- For macOS:
- Go to System Preferences and select Sound.
- In the Output tab, choose your TV from the list of available audio output devices.
- Once selected, your audio will now play through the TV speakers.
Step 7: Final Adjustments and Enjoy
With the video and audio now correctly routed through your TV, you should be ready to enjoy your content on the larger screen. If necessary, you can fine-tune the display settings on your laptop to improve performance or clarity. You can adjust the resolution or tweak the color balance.
Follow this detailed guide to easily connect your laptop to a TV using HDMI. It allows you to enjoy a high-quality viewing experience with minimal setup effort. HDMI makes it simple to bridge the gap between your laptop and TV.
Troubleshooting Common HDMI Connection Issues
HDMI connections are generally straightforward. It is not uncommon to encounter issues during the setup process. Here are some of the most common HDMI connection problems and how to troubleshoot them effectively.
-
No Signal on TV
One of the most common issues is the TV displaying a “No Signal” message after connecting your laptop via HDMI. This usually means that the TV is not receiving the video signal from your laptop.
Troubleshooting Tips:
- Check the Input Source: Ensure that your TV is set to the correct HDMI input. Use the remote to navigate to the right HDMI port (HDMI 1, HDMI 2).
- Ensure Both Devices Are Powered On: Double-check that both your laptop and TV are turned on.
- Check the HDMI Cable: Try unplugging and replugging the HDMI cable from both devices. If possible, test the cable with another device to ensure it is working properly.
-
Poor or No Display Quality
If the display quality is poor (flickering, blurry, or low resolution), or if the TV screen remains blank, the issue might be related to the display settings or HDMI cable.
Troubleshooting Tips:
- Adjust Display Settings: On your laptop, go to Display settings (Windows) or System Preferences > Displays (macOS) and ensure that the output resolution matches the TV’s capabilities. If your TV supports 4K, but the resolution is set lower increase the resolution accordingly.
- Replace the HDMI Cable: If the screen flickers or the picture quality is poor, try using a different HDMI cable. Some lower-quality cables may not support higher resolutions (such as 4K). That may leads to a degraded experience.
- Update Display Drivers: Ensure that your laptop’s graphics drivers are up to date. On Windows, you can update drivers through the Device Manager, while macOS updates occur through System Preferences.
-
No Sound from TV
You might encounter a situation where video is playing perfectly on your TV. But the audio continues to come from your laptop instead of the TV’s speakers.
Troubleshooting Tips:
- Set TV as the Default Audio Device:
- For Windows, right-click on the Speaker icon in the taskbar, select Playback devices, and choose your TV from the list. Set it as the default device.
- For macOS, go to System Preferences > Sound and select your TV as the audio output device.
- Check TV Volume: Ensure that the TV’s volume is not muted or set too low.
-
HDMI Not Detected by Laptop
If your laptop does not recognize the TV after connecting via HDMI, it may not automatically detect the external display.
Troubleshooting Tips:
- Manually Detect Display:
- On Windows, go to Display settings and click on Detect under the multiple display section to force your laptop to search for connected displays.
- On macOS, go to System Preferences > Displays and click on the Detect Displays button.
- Restart Both Devices: Sometimes, simply restarting your laptop and TV can resolve the issue by forcing the devices to reconnect.
- Test with Another HDMI Port: If your TV has multiple HDMI ports, try switching to another one to see if the laptop detects it.
-
Incompatible HDMI Version
HDMI cables come in various versions. Some older cables may not support the resolution or features you are trying to use (4K resolution, HDR, high frame rates).
Troubleshooting Tips:
- Use an HDMI 2.0 or 2.1 Cable: If you are connecting to a 4K or high-definition TV, ensure that your cable supports HDMI 2.0 or higher for optimal quality and compatibility. Older HDMI versions (like HDMI 1.4) may not work with newer resolutions and features.
-
Laptop Screen Not Projecting Properly
Sometimes, after connecting, your laptop screen may project incorrectly on the TV. The screen could be cut off, appear stretched, or show black bars around the edges.
Troubleshooting Tips:
- Adjust the Aspect Ratio on the TV: Go to your TV’s settings menu and adjust the aspect ratio or screen size. Look for options like Screen Fit, Just Scan, or 1:1 Pixel Mapping to display the image correctly.
- Change the Display Mode on Your Laptop: In your laptop’s display settings, adjust the display mode (duplicate, extend, or second screen only) to see which option resolves the issue.
-
Intermittent Connection or Flickering
If the HDMI connection keeps dropping out or the screen flickers, it may be due to a weak or loose connection, faulty cable, or an issue with your laptop’s or TV’s ports.
Troubleshooting Tips:
- Secure the HDMI Cable: Ensure the cable is firmly connected to both the laptop and TV. A loose connection can cause intermittent issues.
- Check for Cable Damage: Examine the HDMI cable for any visible damage like frayed ends or bent connectors. Replace it if necessary.
- Change the HDMI Port: If one HDMI port is not providing a stable connection, try another HDMI port on your TV.
Follow these troubleshooting steps to resolve most common HDMI connection issues. Whether it is a no-signal error, display problem, or sound issue, these tips will help ensure a smooth and enjoyable experience when connecting your laptop to your TV via HDMI.
Additional Tips for a Smooth HDMI Connection
Ensure that your HDMI connection between your laptop and TV is seamless. Here are some extra tips to enhance the overall experience. These small steps can help you avoid issues and optimize the quality of your display and sound.
-
Use High-Quality HDMI Cables
Investing in a good HDMI cable is crucial to ensure reliable performance. That is especially when dealing with high-resolution video and audio formats. Not all HDMI cables are equal. Cheaper options may not support the bandwidth required for 4K or HDR content. Look for cables that are labeled as HDMI 2.0 or HDMI 2.1 for best results.
- Why It Matters: High-quality cables reduce the risk of connection drops, signal interference, and poor video or sound quality. They also support features like 4K, HDR, and Dolby Atmos.
-
Regularly Update Your Laptop’s Graphics Drivers
Outdated drivers can cause problems when attempting to connect your laptop to a TV. Ensure that your graphics drivers are up to date to avoid compatibility issues.
- How to Update:
- For Windows, go to Device Manager, find your display adapter, right-click, and select Update driver.
- For macOS, updates are handled through System Preferences under Software Update.
-
Ensure Compatibility Between Devices
Not all laptops and TVs may support the same HDMI standards. For example, older laptops may have an HDMI 1.4 port, while newer TVs support HDMI 2.0 or 2.1. That means they might not fully utilize features like 4K resolution or high dynamic range (HDR).
- What to Check: Confirm the HDMI version supported by both your laptop and TV. If you are connecting to a 4K TV, ensure that your laptop can handle higher resolution output.
-
Keep HDMI Ports Clean
Over time, HDMI ports can accumulate dust. That may interfere with the connection. This can result in signal loss or intermittent flickering of the screen.
- How to Clean: Use a soft, dry brush or compressed air to gently clean the ports on both your laptop and TV.
-
Consider Using an HDMI Adapter
If your laptop does not have a standard HDMI port (newer ultrabooks or MacBooks that rely on USB-C ports), you will need an adapter. It is important to use a high-quality HDMI adapter to avoid connection issues.
- Adapter Types:
- USB-C to HDMI: For newer laptops with only USB-C ports.
- Mini HDMI to HDMI: For devices with mini HDMI outputs.
Always ensure that the adapter is compatible with your laptop’s port. and they need to support the resolution you need.
-
Optimize Display Settings for Better Quality
Once your devices are connected, tweaking the display settings can significantly improve your viewing experience. Adjust the resolution and aspect ratio on both the TV and laptop. That will ensure the screen is displayed correctly.
- Display Settings Adjustments:
- On Windows, go to Settings > System > Display and adjust the screen resolution.
- On macOS, go to System Preferences > Displays to adjust the display resolution and arrangement.
Many TVs also have settings like Game Mode or Cinema Mode. That optimizes the display for different types of content. Experiment with these to find the best visual quality.
-
Disable Power-Saving Modes on Your Laptop
Power-saving modes on laptops can interfere with the HDMI signal by reducing performance or turning off the external display to save energy. If you are experiencing intermittent disconnections or screen flickering, check your laptop’s power settings.
- How to Adjust:
- On Windows, go to Control Panel > Power Options and select High Performance or adjust the plan settings to prevent the screen from turning off.
- On macOS, go to System Preferences > Energy Saver and disable the options that put the display or computer to sleep.
-
Use Shorter HDMI Cables for Better Signal Strength
HDMI cables come in a variety of lengths. While longer cables can be convenient, they may weaken the signal over greater distances. If possible, try to use a shorter cable (under 10 feet) for better signal transmission and image quality.
- When to Use Longer Cables: If you absolutely need a longer cable, ensure it is a high-quality HDMI cable designed for long distances or consider using an HDMI signal booster.
-
Avoid Cable Bending and Strain
Tightly bending an HDMI cable or forcing it into tight spaces can damage the internal wiring. That can lead to intermittent connection problems or loss of signal.
- Prevent Damage: Ensure that the HDMI cable is laid out smoothly without any sharp bends. That is near the connectors. Use cable management solutions to avoid straining the cable.
-
Enable HDMI-CEC for Simplified Control
Most modern TVs and devices support HDMI-CEC (Consumer Electronics Control). That allows one remote to control multiple devices connected via HDMI. For example, you can control your laptop’s playback features using your TV remote. That simplifies the user experience.
- How to Enable HDMI-CEC: Check your TV’s settings to enable HDMI-CEC. Different TV brands may refer to this feature by different names (Anynet+ for Samsung, Bravia Sync for Sony, Simplink for LG).
Follow these additional tips to ensure that your HDMI connection is stable, reliable. And it offers the best possible audio and visual experience. Whether it is using the right cable or optimizing display settings, these strategies will help you avoid common pitfalls and enjoy seamless connectivity between your devices.
HDMI Alternatives: Other Ways to Connect TV and Laptop
HDMI is one of the most popular ways to connect a laptop to a TV. But, there are several alternative methods available. They can provide a similar or even enhanced viewing experience. Whether you are dealing with an HDMI port issue or simply exploring different options, here are some other ways to connect your laptop to your TV.
-
VGA (Video Graphics Array)
VGA is an older standard that transmits analog video signals. It does not offer the high-quality digital transmission of HDMI. But it is still a viable option for older TVs or laptops that may lack HDMI ports.
- How It Works: Connect a VGA cable between the laptop’s VGA output and the TV’s VGA input. Because VGA only transmits video, you will need a separate 3.5mm audio cable to send sound from your laptop to your TV’s speakers.
- Pros:
- Common on older devices.
- Simple to set up.
- Cons:
- Limited to lower resolutions.
- Requires an additional cable for audio.
-
DVI (Digital Visual Interface)
DVI is another older alternative. It is mainly used in monitors. But some TVs and laptops still support it. Like VGA, DVI only carries video signals. So an additional audio solution is needed.
- How It Works: Use a DVI-to-HDMI adapter if your TV has an HDMI port or a direct DVI-to-DVI cable if both devices have DVI ports. To get audio, you can use your laptop’s headphone jack or an external speaker system.
- Pros:
- Offers better image quality than VGA (supports digital signal).
- Works with adapters for HDMI.
- Cons:
- Does not carry audio.
- Less common on modern devices.
-
DisplayPort
DisplayPort is a modern video and audio interface. That is typically found on newer laptops and monitors. It is a great alternative to HDMI. That is especially for high-resolution video and audio transmission.
- How It Works: If your TV does not have a DisplayPort input, you can use a DisplayPort-to-HDMI adapter to connect your laptop to the TV. DisplayPort supports both audio and video. So you do not need a separate audio cable.
- Pros:
- Supports 4K resolution and beyond.
- Carries both audio and video in a single cable.
- Ideal for high-performance monitors and TVs.
- Cons:
- Less common on TVs compared to HDMI.
- May require an adapter for HDMI input.
-
USB-C to HDMI
Many modern laptops, particularly ultrabooks and MacBooks, feature USB-C ports rather than traditional HDMI or VGA. USB-C is a versatile port that can transmit both video and audio when paired with the correct adapter.
- How It Works: Use a USB-C to HDMI adapter to connect the laptop to the TV. Once plugged in, the laptop will transmit both video and audio to the TV via HDMI.
- Pros:
- Supports high-resolution 4K video and audio.
- Compact and multipurpose port.
- Ideal for newer laptops without an HDMI port.
- Cons:
- Requires a separate USB-C to HDMI adapter.
- Some lower-end adapters may not support 4K resolution.
-
Wireless Display (Wi-Fi and Casting)
Wireless display technology allows you to connect your laptop to a TV without any cables. This option is ideal if you prefer a clutter-free setup or if your laptop and TV are in different rooms.
- How It Works: There are several wireless technologies available:
- Miracast: Many Windows laptops support Miracast. It allows you to wirelessly project your laptop screen onto a TV that also supports Miracast. It’s built into Windows under Project to a second screen.
- Google Chromecast: You can cast content from a Chrome browser tab or mirror your laptop’s screen using a Chromecast device connected to your TV.
- Apple AirPlay: For MacBook users, AirPlay can be used to wirelessly mirror your screen on an Apple TV or other AirPlay-compatible devices.
- Pros:
- No cables required.
- Convenient for streaming media.
- Supports video and audio.
- Cons:
- May experience slight delays or quality reduction depending on network strength.
- Requires a wireless network and compatible TV or streaming device.
-
Smart TV Apps and Built-in Casting
Many smart TVs come with built-in features or apps that allow you to stream or mirror content from your laptop without any additional hardware.
- How It Works: Some TVs have built-in support for Google Cast, DLNA, or other wireless streaming technologies. You can also use apps like YouTube, Netflix, or Plex on your laptop to cast content directly to the TV.
- Pros:
- Seamless integration with smart TVs.
- No cables or adapters needed.
- Works well for media streaming.
- Cons:
- Limited to certain apps and content.
- May not support screen mirroring for all tasks.
-
Thunderbolt
Thunderbolt is an advanced connection technology. It provides ultra-fast data transfer speeds and supports video and audio output. Thunderbolt 3 and 4 ports use the same connector as USB-C. But they offer additional capabilities. That includes support for high-resolution displays.
- How It Works: Like USB-C, a Thunderbolt to HDMI adapter is typically used to connect the laptop to the TV. Thunderbolt supports both video and audio. It allows you to mirror your laptop screen or extend the display to the TV.
- Pros:
- Extremely fast data transfer speeds.
- Supports 4K or higher resolutions.
- Dual function as a data and display port.
- Cons:
- Requires a compatible adapter.
- Limited availability on some laptops and TVs.
-
RCA (Composite) Cables
Though largely outdated, some older TVs may still support RCA (red, yellow, and white) cables for video and audio. This method is generally a last resort if your devices lack more modern connectivity options.
- How It Works: Use an HDMI to RCA converter or connect directly if your laptop has a compatible output (though most modern laptops do not have).
- Pros:
- Works with older TVs.
- Can be used as a backup if other options are unavailable.
- Cons:
- Poor video and audio quality compared to HDMI or DisplayPort.
- Limited support for high-resolution content.
While HDMI is the most common option for connecting a laptop to a TV, these alternatives can be useful depending on the devices and ports available. You may prefer a wired or wireless connection. Understanding the benefits and limitations of each method allows you to choose the best solution for your needs.
Using Wireless HDMI Solutions
Wireless HDMI is an innovative technology. It allows you to stream high-definition video and audio from your laptop to a TV without the need for physical cables. This solution is ideal for those who want a clean, clutter-free setup or for scenarios where it may be inconvenient or impossible to run long HDMI cables. Here is a detailed look at how wireless HDMI works, its benefits, and the available solutions.
-
What is Wireless HDMI?
Wireless HDMI technology transmits high-definition video and audio signals from one device (like a laptop or gaming console) to another (like a TV or projector) over radio waves instead of physical cables. This transmission is usually done through a wireless HDMI transmitter and receiver system. Wireless HDMI enables you to enjoy the benefits of HDMI without the need for a direct connection.
-
How Does Wireless HDMI Work?
Wireless HDMI typically works using a transmitter connected to the source device (laptop) and a receiver connected to the TV or monitor. These two devices communicate via Wi-Fi, radio frequencies, or proprietary wireless protocols to stream the content.
How it works step-by-step:
- Step 1: Connect the wireless HDMI transmitter to your laptop’s HDMI port or another video output port (with adapters if necessary).
- Step 2: Plug the wireless HDMI receiver into one of the HDMI input ports on your TV or projector.
- Step 3: Once both devices are connected, the wireless system will automatically pair and transmit audio and video from the laptop to the TV. That is just like a regular HDMI cable would do.
- Step 4: Configure the display settings on your laptop. Configuring ensure it is outputting the video to the TV.
-
Benefits of Wireless HDMI
- Clutter-Free Setup: No need for a physical cable running between devices. Therefore, wireless HDMI creates a cleaner, more organized setup. That is particularly in home theaters or offices.
- Long-Distance Connectivity: Wireless HDMI solutions can transmit video and audio over significant distances (typically 30-100 feet). That makes it ideal for large rooms or situations where a cable might not reach.
- Full HD and 4K Support: Many wireless HDMI systems support Full HD (1080p) and even 4K resolution. That allows for crisp and high-quality visuals.
- Low Latency: High-quality wireless HDMI systems offer minimal latency (the delay between the source and the display). That makes them suitable for activities like gaming or watching fast-paced content without noticeable lag.
- Easy to Set Up: Unlike complicated wired installations, wireless HDMI systems are generally plug-and-play. Therefore, it comes with minimal configuration.
- Portability: Since there are no cumbersome wires, the wireless HDMI transmitter and receiver are easy to move. That makes them an excellent option for both home use and on-the-go presentations.
-
Popular Wireless HDMI Solutions
There are a variety of wireless HDMI systems available. Each one comes with different features and price points. Here are a few common options:
- 1. IOGEAR Wireless HDMI Transmitter and Receiver
- This system offers a reliable connection for Full HD 1080p video and audio transmission with a range of up to 100 feet. It is simple to set up and is ideal for home theater use.
- 2. J-Tech Digital Wireless HDMI Extender
- The J-Tech extender supports long-range transmission of 1080p video up to 200 feet in open space. It is an excellent option for those who need to transmit signals over longer distances without lag or quality degradation.
- 3. Actiontec MyWirelessTV2
- The MyWirelessTV2 allows wireless streaming of Full HD 1080p video and 5.1 surround sound audio with low latency. That makes it ideal for gaming and watching fast-paced action movies.
- 4. Nyrius Aries Pro
- This high-performance wireless HDMI solution supports 1080p video with zero latency. It is perfect for gamers or those needing seamless video streaming. It also has a sleek, compact design.
-
Potential Drawbacks of Wireless HDMI
- Interference: Wireless HDMI systems can be subject to interference from other wireless devices like Wi-Fi routers or Bluetooth devices. That is potentially causing a drop in quality or signal disruptions.
- Distance Limitations: Wireless HDMI solutions offer long-range connectivity. But obstacles like walls, furniture, or other electronic devices can reduce the effective transmission range.
- Higher Cost: Wireless HDMI systems are generally more expensive than a standard HDMI cable. However, the added flexibility and convenience can make the investment worthwhile for many users.
- Power Supply: Both the transmitter and receiver require power. It gets power usually through USB or separate power adapters. That feature for power could limit the placement flexibility unless outlets or USB ports are readily available.
-
Applications of Wireless HDMI
Wireless HDMI solutions are used in various scenarios where flexibility and convenience are important:
- Home Theaters: For people who want to create a sleek, wireless entertainment center without visible cables.
- Business Presentations: Wireless HDMI is perfect for boardrooms. In which, laptops can be easily connected to projectors or large displays without the hassle of cable management.
- Gaming: Gamers who want a clutter-free setup with minimal latency often prefer wireless HDMI for streaming their gameplay to larger screens.
- Outdoor Screenings: Wireless HDMI can be used to project content outdoors without the need for long, cumbersome cables.
Wireless HDMI offers an easy, convenient alternative to traditional HDMI cables. That makes it easier to connect your laptop to a TV without the hassle of physical wires. Wireless HDMI can provide the high-quality connection you need with the flexibility you want.
Screen Mirroring: Connecting Without HDMI
Screen mirroring is another convenient method to connect your laptop to a TV without the use of an HDMI cable. This technology allows you to wirelessly duplicate your laptop’s display on your TV screen. It is providing flexibility and eliminating the need for physical connections. Here is a breakdown of how screen mirroring works, its advantages, and the different options available for various devices.
-
What is Screen Mirroring?
Screen mirroring allows you to wirelessly project the content of your laptop or mobile device directly onto your TV screen. HDMI cable requires a physical connection but screen mirroring works over Wi-Fi. It allows you to view everything from video and presentations to web browsing and applications in real time.
It’s a great option for sharing content during meetings, streaming videos, or simply expanding your laptop’s display for a more immersive experience.
-
How Does Screen Mirroring Work?
Screen mirroring typically works through built-in software or third-party applications. It allows your laptop to cast its display wirelessly. Here is a general overview of how to set it up:
- Step 1: Make sure both your laptop and TV are connected to the same Wi-Fi network.
- Step 2: Enable the screen mirroring or casting function on your TV. This can vary depending on the TV brand. But most smart TVs support this feature under different names such as Miracast, AirPlay, or Chromecast.
- Step 3: On your laptop, go to the display settings and choose the option to cast or mirror your screen. Select your TV from the available devices list.
- Step 4: Once connected, your laptop’s screen will be mirrored on the TV. That allows you to control everything directly from your laptop while viewing it on the larger display.
-
Popular Screen Mirroring Methods
- Miracast
- It is a widely supported wireless display standard. Miracast is often built into both Windows laptops and many smart TVs. It mirrors your screen in real-time. That allows you to enjoy high-definition video and audio streaming. You do not need an internet connection to use Miracast. But both devices must be Miracast-compatible.
- AirPlay (for Apple Devices)
- If you are using a MacBook then AirPlay is a seamless option for wirelessly connecting to your Apple TV or other AirPlay-compatible smart TVs. This proprietary technology allows you to mirror your Mac’s display and stream content like movies, music, and presentations.
- Google Chromecast
- Chromecast is a popular screen mirroring solution. That allows Android and iOS devices, as well as laptops, to stream content to a TV. You can mirror your entire screen or cast specific content like videos or music. With the Google Chrome browser, you can cast your desktop or specific tabs. That makes it versatile for most operating systems.
- Third-Party Apps
- If your devices do not natively support screen mirroring, third-party apps like LetsView, ApowerMirror, and Reflector can provide the functionality you need. These apps work across multiple platforms. And they offer features like real-time mirroring, screen recording, and annotations.
-
Benefits of Screen Mirroring
- Wireless Flexibility: Unlike HDMI, screen mirroring does not require any cables. That makes it ideal for people who prefer a clean, wireless setup.
- Ease of Use: Screen mirroring is generally easy to set up and configure. With a few clicks or taps, you can mirror your screen without needing additional hardware like adapters or dongles.
- Compatibility Across Devices: Whether you are using Windows, macOS, Android, or iOS, there are options for screen mirroring across most major operating systems. Many smart TVs come with built-in screen mirroring support. That eliminates the need for external devices.
- Real-Time Mirroring: With screen mirroring, your laptop’s actions are displayed in real-time on the TV. That makes it perfect for activities like presentations, gaming, and web browsing.
- HD Quality: Most modern screen mirroring technologies support Full HD video and high-quality audio. They provide a best viewing experience similar to that of an HDMI connection.
-
Drawbacks of Screen Mirroring
- Latency Issues: Depending on your Wi-Fi connection and the devices being used, you may experience some latency (delay) between your laptop and the TV. This can make certain activities, like gaming or fast-paced video watching, less smooth compared to HDMI.
- Wi-Fi Dependency: Screen mirroring requires both your laptop and TV to be on the same Wi-Fi network. If your network connection is weak or unstable, this could affect the quality and consistency of the mirrored display.
- Limited Range: Unlike HDMI, it provides a stable connection regardless of distance. Screen mirroring is limited by your Wi-Fi range. The further you move away from the router, the weaker the connection can become.
- Compression Artifacts: Wireless screen mirroring can sometimes introduce compression artifacts. That is particularly if you are streaming high-quality video content. These results in a slightly degraded visual experience compared to a wired HDMI connection.
-
When to Use Screen Mirroring
Screen mirroring is an excellent choice in a variety of scenarios:
- Presentations: Whether you are in a classroom or boardroom, screen mirroring lets you display presentations from your laptop onto a large screen without needing to fumble with cables.
- Entertainment: Stream your favorite shows, movies, or music directly from your laptop to your TV with screen mirroring. It is especially convenient when your TV does not have built-in apps or you prefer using your laptop’s apps.
- Gaming: Although latency may be an issue for fast-paced games, casual gaming and retro games. That is perfectly suited for wireless mirroring to a big screen.
- Web Browsing: If you want to display web content or social media feeds on a larger screen, screen mirroring offers a simple and effective solution.
Screen mirroring is a versatile and wireless alternative to HDMI. It allows you to connect your laptop and TV with ease. Whether through native support like Miracast or AirPlay or using external solutions like Chromecast, this technology is perfect for those who value convenience and want a clutter-free setup. However, it is essential to be aware of the potential limitations such as latency and Wi-Fi dependency. Those can affect the performance depending on your use case.
Conclusion: Enjoy Your Connected Devices
Successfully connecting your laptop to your TV using HDMI or alternative methods can unlock a world of enhanced entertainment and productivity. Whether you are streaming movies, sharing presentations, or gaming on a bigger screen, the simplicity and versatility of these connections enable seamless integration between your devices. HDMI remains a trusted standard for transmitting high-quality audio and video with ease. In this blog post, you explore new ways to connect and enjoy content. Further it helps you to troubleshoot and optimize your setup ensures smooth, stress-free viewing experiences.
Ultimately, you can rely on HDMI or exploring wireless alternatives like screen mirroring. The ability to connect your devices opens up exciting opportunities for entertainment, productivity, and convenience. With your devices working in synchronization, you are ready to enjoy the full potential of your multimedia setup.
Maximize the Benefits of HDMI for Better Viewing Experiences
HDMI is designed to deliver crystal-clear visuals and rich sound. That makes it the perfect option for connecting devices like laptops and TVs. To truly maximize the benefits of HDMI and enhance your viewing experience, consider the following tips:
- Invest in High-Quality HDMI Cables: Using premium HDMI cables can improve the stability and quality of your connection. This is particularly important if you are working with 4K content or high frame rates. A sturdy, high-speed cable ensures consistent transmission of data without signal degradation.
- Enable Advanced Display Settings: Most modern TVs and laptops offer advanced HDMI settings like support for HDR (High Dynamic Range) or enhanced refresh rates. Take advantage of these settings to improve the visual output. That is especially for movies and gaming.
- Ensure Proper Cable Length: Longer HDMI cables can experience signal loss over distance. For best results, use cables no longer than 15-20 feet for a stable connection. If you need a longer reach, consider using an HDMI signal booster or an active HDMI cable.
- Keep Your Devices Updated: Ensure both your laptop and TV has the latest firmware and software updates installed. These updates often include improvements for HDMI compatibility and performance. It allows you to avoid any potential issues.
- Optimize Audio Settings: HDMI carries both audio and video signals. To get the most out of your audio setup, make sure your TV or external sound system is configured for optimal sound quality. Adjust settings like surround sound or audio synchronization to ensure your viewing experience is immersive and synchronized.
- Minimize Interference: HDMI connections can be sensitive to interference from other electronic devices. Keep your HDMI cables and devices away from sources of interference, like routers or other wireless devices. That will maintain a clear and stable connection.
- Test Different Display Modes: Depending on your use case—whether it is watching movies, giving presentations, or gaming—experiment with different display modes. HDMI allows you to extend, duplicate, or mirror your screen. It is offering flexibility for various activities.
Maximize the potential of your HDMI connection to ensure an enhanced viewing experience that brings out the best in your content. Whether you are enjoying high-definition movies, presentations, or games, a properly optimized HDMI setup will transform your multimedia experience into something truly immersive and enjoyable.
FAQ: How to Connect HDMI to TV and Laptop
This FAQ section addresses common concerns and offers practical solutions to ensure a smooth experience when connecting a laptop to a TV via HDMI.
-
What is HDMI and why is it important for connecting devices?
High-Definition Multimedia Interface is a widely used standard for transmitting both high-definition video and audio between devices. It is essential for connecting laptops to TVs, projectors, and other displays because it delivers superior picture and sound quality with a single cable.
-
How do I know if my laptop and TV support HDMI?
Most modern laptops and TVs come with an HDMI port. You can check by looking for the label “HDMI” near the port on both your laptop and TV. If either device lacks an HDMI port, you can use an adapter that converts other formats (USB-C or DisplayPort, to HDMI).
-
Can I connect my laptop to a TV without HDMI?
Yes, you can connect a laptop to a TV using alternatives like screen mirroring, wireless HDMI solutions, or other connectors like VGA, DisplayPort, or USB-C with the appropriate adapters. Screen mirroring options like Chromecast, AirPlay, or Miracast, allow you to wirelessly stream your laptop’s display to the TV.
-
What should I do if there is no sound when I connect my laptop to the TV via HDMI?
If the video displays but there is no sound, go to your laptop’s sound settings and ensure that the HDMI output is selected as the default audio device. On Windows, this can be found in Control Panel > Sound. On macOS, go to System Preferences > Sound and choose the HDMI option.
-
Why is my HDMI connection not working?
There could be several reasons for an HDMI connection failure:
- The HDMI cable may be damaged.
- The HDMI port on your laptop or TV may be faulty.
- Incorrect display settings on your laptop (try adjusting display output modes).
- Your TV may be on the wrong input source (make sure it is set to the HDMI port you are using).
Restarting both devices and trying a different HDMI cable may resolve the issue.
-
How do I switch between different HDMI sources on my TV?
To switch between HDMI sources, use your TV remote to access the Input or Source button. Navigate through the available HDMI ports until you find the one your laptop is connected to (HDMI 1, HDMI 2, etc.).
-
Can I connect multiple devices to my TV’s HDMI ports?
Yes, if your TV has multiple HDMI ports, you can connect several devices, such as laptops, gaming consoles, or streaming devices, at the same time. You can switch between these devices using the Input or Source button on your TV remote.
-
What type of HDMI cable do I need for 4K video?
For 4K video at 60 Hz, you will need a High-Speed HDMI cable or HDMI 2.0 or above. These cables are designed to support the higher bandwidth required for ultra-high-definition (UHD) resolutions and fast refresh rates.
-
Can I charge my laptop using an HDMI cable?
No, HDMI cables are not designed for charging devices. They only transmit video and audio signals. For charging your laptop, you will need to use the appropriate charging cable that came with your laptop.
-
What is the difference between mirroring and extending the display?
When you mirror your display, the same content from your laptop screen is shown on the TV. When you extend the display, your TV becomes an additional screen. That is giving you additional screen. You can control these options in your laptop’s display settings (for Windows, use Windows + P; for macOS, go to System Preferences > Displays).
-
How can I improve the quality of my HDMI connection?
To enhance the quality of your HDMI connection:
- Use high-quality HDMI cables. That is especially for 4K or high-definition displays.
- Ensure your laptop and TV supports the desired resolution and refresh rate.
- Keep your HDMI cable length short (under 15 feet) to avoid signal loss.