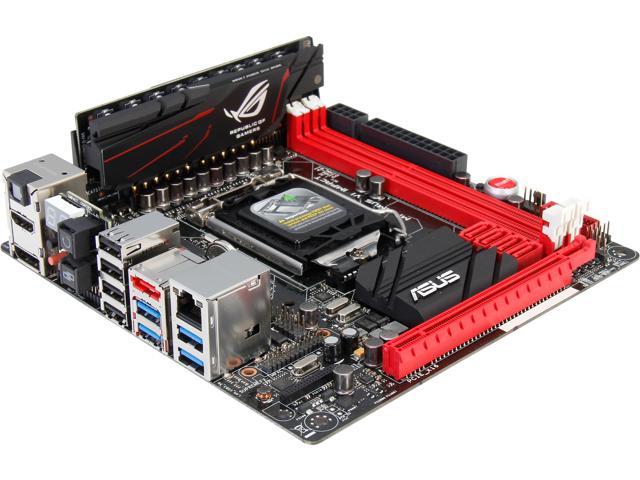
You can find different ports like VGA, HDMI, USB, etc., in your computer. These help you to connect displays or other devices to it. A few of them have connections to the motherboard with your extension cable. If you are willing to connect to more than one device, your motherboard HDMI might not work. But do you know why you have found your hdmi in motherboard not working?
The problem can happen for multiple reasons, from hardware faults to simple configuration issues. Sometimes, your computer may use a faulty cable or a disabled high-definition multimedia interface function.
Why is my motherboard HDMI not working?
Why is the HDMI port on my motherboard not working? The problem can arise for different reasons. If you have found CPU Onboard Graphics HDMI Output not Working in the BIOS, it will cause the issue.
Besides, you must also verify that you need to connect the cable to ports. These are the possible reasons you find your HDMI port on motherboard not working.
- Bad HDMI cable
- Faulty External Device
- Damaged HDMI port
- Absence of Integrated Graphics
- Disabled Integrated Graphics
- Outdated Graphics or Hardware Drivers
- Incorrect Display Settings
- New Display Updates Not Installed
Can you use Motherboard HDMI with a graphics card?
Yes, it is possible by using GPU ports. However, in this case, you should remember that the graphics card only has a display and DVI ports. Therefore, your second monitor must come with these ports.
Remember that you must not get worried if you ever use a monitor that doesn’t have these ports or you wish to use television. It is because you can use the port with the GPU using a display port to high-definition cable on those devices.
Besides, you need to note also that the BIOS must be compatible with the feature of using multiple displays simultaneously if you use two monitors simultaneously.
A few motherboards can turn on the option, but you must check if you have enabled it in BIOS. This option is available in BIOS and will provide multi-monitor support for your motherboard.
You only need to move to your BIOS settings. After that, your task is to enable an option called onboard video under graphics configuration. Remember that if you enable this, it will not deliver good performance depending on the mainboard.
How To Fix Motherboard HDMI No Signal:
Now you know which are the reasons causing the problem. So let’s understand how we can solve the problem. Before that, you must ensure that your system comes with an integrated graphics card called iGPU.
It is because mainboards can not process videos independently—even the CPU’s integrated graphics card powers every video output port on the back of the mainboard. So whether you use an Intel model, you will have the feature, but a few do not come with it.
Go through the steps to check if you have an integrated GPU:
- First, your task is to go to the Start menu and open it.
- After that, you should find the Device Manager and tap on the first result.
- Next, you should tap the Display Adaptors option twice to expand it.
- In case you find an iGPU, go with the fixes.
- But if you haven’t seen anything, your job is to upgrade the CPU with one which has an integrated GPU.
- Now the first job is done.
How to Fix Motherboard HDMI Not Working:
These are the ways through which you can get rid of motherboard HDMI not working problem:
-
Enable HDMI In BIOS:
Sometimes, your integrated graphics may be turned off by default in the system. As a result, you can get the no signal error. Therefore, now all you have to do is to turn it on from BIOS. The steps to follow are:-
- You should disable the system completely.
- Next, your job is to enable the computer. Hence, you should continue tapping the Esc key repeatedly until a menu appears.
- Now, you should find the key beside the BIOS settings. After that, you have to tap on that on the keyboard.
- Next, you can see the BIOS settings appearing. Again, you can find this tricky as the option comes with various labels on various computers.
- After that, you should find a setting like Enable iGPU or Enable Multi-GPU support and enable it.
- Once you complete the step, you should save it and exit from there.
If you try to connect the high-definition wire now, you will find it working flawlessly. Generally, most people get rid of the problem following the trick. But if the setting in BIOS was enabled, you should continue reading. Sometimes, you may not get any option available in the BIOS. Hence, you should try to update your integrated graphics drivers. After that, you need to turn on the option in BIOS.
-
Turn On The Monitor And Computer In Opposite Order:
Sometimes, you can find the problem while switching on the monitor first and then the computer. That is why you need to try the opposite. You should power on the computer first and monitor after that. Remember that the external device is mentioned here as a monitor. Your television can work as a monitor also.
-
Update Your Firmware:
You should try the fix only while trying to connect the high-definition multimedia interface to a TV display. It is because we know monitors don’t get any firmware updates. However, it might not always work for you.
Updating firmware depends on what tv you use, but the process is straightforward. Whether you are facing problems, you should contact the support team for your TV.
-
Check Your Cable:
Mainly hardware problems occur from faulty cables. For example, the high-definition wire, which includes external devices, might have been damaged. If you want to ensure it is causing the problem, you should use another functioning cable. After that, your job is to attach the working high-definition wire to the device like a monitor. After that, you should connect it to the high-definition port on your mainboard.
If the display is visible in the system, ensure that the high-definition multimedia interface works fine. Next, you need to exchange the cable. If you are willing, use the cable to another working port of the PC or other system. Then, you should check if it works. Finally, you should look at the following solution to whether the wire works properly in another system.
-
Check Your Device:
You should ensure that your device is working accurately. Hence, you should check it first. Then, if you don’t find any problem, go ahead with the process.
Try to plug the device into the GPU port or another functioning computer. Whether your device works properly, ensure the problem is with the mainboard’s HDMI. Besides, you should check if the external device and cable are in good shape.
-
Enable Integrated Graphics:
If you use a dedicated graphics card to run the primary monitor, you may find the integrated graphics or iGPU disabled by the system. Another reason for HDMI from the motherboard not working is the absence of integrated graphics in your system. In most cases, these come with a graphics card embedded directly. But a few models do not offer an integrated graphics system.
Your first job is to ensure that your system comes with these graphics apart from the dedicated one. Please go through the instructions to check it.
- First, your job is to tap on “Windows + ‘X'” and choose the option “Device Manager.”
- After that, your task is to find the “Display Adapters” option and tap on it.
- Whether you find any option like “Intel(R) Integrated Graphics” or similar, you can find the hardware in the system.
Suppose you possess the hardware. Therefore, you must enable it for the system. In this case, your job is to enter BIOS mode to begin the function of integrated graphics. Now, you should check out the procedure step-by-step.
- Firstly, you should reboot the computer.
- After that, repeatedly hit the respective key assigned to the PC (Esc, F2, F12, Del). You should start pressing them after your system begins to power up to open the BIOS.
- Next, you should look for “Graphics Configuration” or a similar option in the BIOS settings.
- Then, find these options “Onboard Video,” “Internal Graphics,” “Multi-Monitor,” or “iGPU” as per the PC.
- Now, you have to turn on the feature.
- Finally, your job is to reboot the system. If you’re willing, check if the PC shows the device while connecting it through the Motherboard HDMI. If you can’t see the device till now, try another solution.
-
Modify Display Settings:
How could you know that you have encountered the problem? Is it because your extra-connected display is not showing anything? If that is the case, you will have incorrect display settings.
You might get four options while connecting many display devices to your system. However, whether the setting is in “PC Screen/Computer Only,” the second display will not display anything. Check out the steps to change the display setting.
- Your first task is to tap on “Windows + ‘P'” to open the display settings.
- After that, you should choose either “Duplicate,” “Extend,” or “Second Screen” options to see content on another display.
- Try another solution if you can’t see anything after changing the settings.
-
Uninstall the Monitors and Reconnect:
Whether you use the high-definition port of the mainboard to set up multiple displays, your system may malfunction to detect the new display. In this case, you should uninstall the monitor and reconnect the displays again.
Go through the steps to uninstall the Monitors.
- Remove the display device which you have plugged into the system.
- Next, tap on “Windows + ‘X'” and choose the option “Device Manager.”
- Then, you should look for the “Monitors” option.
- Tap on each displayed and tap “Uninstall” except for the main one.
- Next, you should reboot the PC and reconnect the device again.
- Now, check if your system can recognize it.
- If you want, power on the second display first. After that, turn on the primary one, or you can do vice-versa, reversing the earlier pattern. If it does the job, you will not face any issues. But if it can’t, try the next solution.
-
Update or Roll Back Graphics Driver:
Mostly, PCs can do the updating procedure automatically. However, if you have turned off automatic updates, remember that your hardware drivers will need them.
Sometimes, the outdated driver software can not detect the inserted hardware. Although it is recognized, the old driver will not support the hardware. Therefore, you need to update your drivers manually, especially the Integrated graphics driver. Check the process to update the integrated graphics driver.
- Tap on “Windows + ‘X'” and select the option “Device Manager.”
- After that, you should tap two times on the “Integrated Graphics” or similar in the “Display Adapter” option.
- Next, navigate to the “Driver” tab.
- Then, you should choose “Update Driver” and tap on “Search Automatically for drivers.”
- Now, you can find the new graphics driver installed in the system.
- It is also possible to update the graphics driver by downloading the installation files from the vendor’s website.
If, after updating the driver, you experience the problem, you should try to roll back the installation. Follow the steps to do it.
- Hence, you should follow the above method of driver updates till step 3.
- Next, you should tap “Roll Back Driver” and continue the process accordingly.
- Finally, you should test if the high-definition port has started working.
-
Troubleshoot Your Hardware:
We generally avoid using the fixing tool— The Troubleshooter. You can find many troubleshooters in Windows OS to fix problems regarding hardware and software. However, as there is an issue with the port, we recommend you run a hardware device troubleshooter. You should follow the steps hence.
- Look for the “Command” option with the help of the search icon.
- After that, you should tap “Command Prompt” and choose “Run as administrator.”
- Next, write this code msdt.exe -id DeviceDiagnostic; after that, you should run it.
- Next, your task is to head toward the option “Advanced” on the “Hardware and Devices” troubleshooter window.
- After that, you should once check the “Apply repairs automatically” option.
- Keep on performing the method afterward according to the instruction.
- Finally, you should plug the device again into the HDMI to check if the issue is solved.
-
Install All Pending Windows Update:
You will get updates in your windows daily to the system. These updates come with a new feature to install in the system. You can also get rid of the problems from previous versions. The updates will be performed automatically. But if you disabled the feature or the system has left some pending updates, you might need to install them. Sometimes, Windows can send the update to repair the hardware.
Perform the process to install all updates done by your Windows automatically to your system.
- First, tap on the “Windows + ‘X'”; after that, you should select the option “Settings.”
- Move to the “Windows Update” option at the menu end on the left.
- Then, your job is to tap on the option “Check for Updates.” You should perform the download and installation if you get the option available.
- If not, look for the “Advanced Options” menu and go into it.
- Now, navigate to “Optional Updates” and tap on the option available under the “Additional Options” section.
- After that, you should choose all updates and tap on the option “Download & Install.”
- You can find the system proceeding to install all the updates.
- Finally, check if any issue remains. If the issue isn’t gone yet, ensure that the problem is with the high-definition port physically.
Whether you use an old system or any physical damage happens to the system, it can harm the port. The damage can also occur because of abnormal power supply and incorrect or forced attempts for connection. Whether the port has suffered physical damage, it is essential to take the system to the nearest service point to check it once.
The Bottom Line:
Problems like no signal on the television are generally frustrating excessively. Try the solutions mentioned earlier to get rid of the problem.
Frequently Asked Questions:-
- Do you know how to enable motherboard HDMI?
You may turn off the CPU onboard graphics HDMI output. If you have done that, you should press the Delete Key or F8 Key and hold it to enter the bios setup. Next, you should check the ‘CPU onboard graphics multi-monitor setting below the Advanced/System Agent Configuration/Graphics Configuration menu. Then, if you are willing, turn on the BIOS setting.
- Why is my motherboard HDMI port not working?
Different reasons can cause the issue. For example, if you have not turned on the CPU onboard graphics HDMI output in the BIOS, it can cause problems.
- Does HDMI work in BIOS?
BIOS must identify the display. Hence, you can see the VGA screen, which should be recognized. However, as it cannot find the display, your options are limited from whom you can get a VGA cable and a screen supporting the VGA cable.


