Have you seen any horizontal lines on your computer screen? There is nothing to worry about. Electronic devices play a crucial role in making human lives simpler. Laptops, smartphones and computers are some of those devices that help to connect people worldwide. But along with getting the benefits of electronic devices, it is also common to experience multiple technical glitches. You can experience glitches due to any hardware or software issues in the system. As a result, you can see horizontal lines on your computer screen, along with other problems — overheating, slow performance, driver issues, and so on. Now, let’s delve into the article to learn how to fix horizontal lines on a computer screen.
What Are Horizontal Lines on a Monitor?
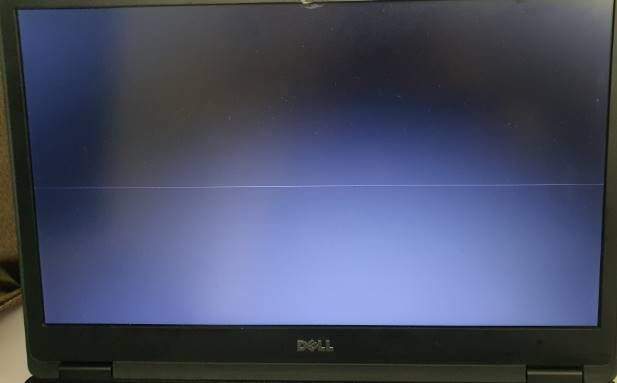
A horizontal line is basically a straight line which goes from left to right and vice versa on the laptop.
What Causes Horizontal Lines on a Monitor?
These are some reasons due to which you can see the lines on your screen:
- The Cables:
Cables help to connect a computing system’s different components. The problems which you can experience related to cables are overheating, improper connection, etc. If the quality of the cable you have used is poor, it can cause such types of glitches. In addition, you need to be aware of some scenarios like defective ribbon cables, physical damage, etc.
- Screen Resolution:
If you set the screen resolution contradicting the screen size, you can see these lines on the screen.
- Expired drivers:
If your device driver is old or your OS has become old beyond the specified dates, you can face this issue.
- Power issues:
There can be a short-circuit in the monitor because of the residual power, resulting in the horizontal lines appearing on the screen.
- Old monitor:
Another reason why you can face the problem is the defects with the monitor.
- Incorrect Refresh Rate Settings:
If the refresh rate is inappropriate, you can see these lines on your screen.
- Hardware issues:
You can face the issue because of potential hardware problems, like a malfunctioning video card, a cracked display, a problematic LCD panel, or even a faulty LCD cable.
- Software Conflicts:
The problem can appear due to software conflicts between hardware and OS or different programs.
Other reasons due to which you can see the lines are as follows:
- Outdated device drivers
- Water damage
- Bending the laptop screen too far in the opposite direction
While you can address a few of these reasons, you might have to go to a repair shop to get rid of this problem because of some of them.
How to Fix Horizontal Lines On A Computer Screen:
Generally, it is not so difficult to troubleshoot the problem. You only need to follow some specific steps to do this task. We have given here the possible ways to fix horizontal lines on a computer screen. You need to check if any electronic or magnetic device exists around your PC or computer. If there are any, you need to remove them before applying the methods. Sometimes, if other devices are present around your computer, these interfere with each other. As a result, you can see the horizontal lines on the screen.
Restart Your System:
The basic troubleshooting method you should try is to restart your system. You can address many problems by applying this method. When you restart your system, it will turn off all the drivers and reboot them thereafter. Thus, it is possible to address the problem.
Replace Ribbon Cable In Windows 10:
Sometimes, you can find your ribbon cable damaged or faulty. As a result, you can see the lines on your device’s screen in Windows 10. You have to replace the cable with a new one. Then, you need to check if the horizontal lines are still appearing on your laptop screen.
Ribbon cables are made of many small-grade cables that are placed parallel to each other and help in data transmission & communication. Therefore, if the cable has any defect, it could affect the video signals transmission process.
Run DISM Scan For Checking & Restoring:
One of the effective ways you can follow to fix the problem is a DISM scan. It can easily help you to resolve the horizontal lines on the laptop screen.
- Your first task is to hold the Windows key and X to invoke the ‘command prompt’. Then, you need to choose ‘Search.’
- Once you see the command prompt on your device’s screen, your task is to copy & paste the commands which are given underneath. Thereafter, your task is to press the Enter button after every command:
- exe /Online /Cleanup-image /Scan health
- exe /Online /Cleanup-image /Restore health
Check Your Monitor:
When you can not get benefits by restarting your system, you need to check your monitor to see if there is any lag. You have to turn off your monitor first. Then, your job is to turn it on. If you see this prevailing, you have to connect your CPU to another monitor so that you can identify the main reason behind the issue you are facing. Following this process, you are able to identify if the issue is with your processor. Suppose your monitor uses in-built settings. In that case, you need to try resetting your monitor to its factory settings. You have to use buttons on the PC monitor to access the options.
Check The Cables Connections:
You need to check if the cables have any loose connections or if any of them are damaged. The reason behind the issue you are facing can be an improper connection. So, what you have to do is to remove all cables and reconnect them thereafter. Especially you have to remove the video cable that is connected to the monitor. Then, your job is to power your system on. Now you have to check if the lines still persist or not.
Change Screen Resolution:
The wrong screen resolution can cause these lines on a laptop or computer screen. In order to get rid of the lines, you have to change the screen resolution. The steps you need to follow are:
- Open Control Panel:
Your first task is to open the control panel to change the screen resolution. In this case, you need to tap on the Start menu. Then, you have to select “Control Panel”.
- Select Display Settings:
As soon as you open the Control Panel, your task is to select the option “Display” from all the available options which you can see in a list. Then, you can see a Display Settings window opening.
- Select Screen Resolution:
You have to select the option “Screen Resolution” from the opened window. Now, you can see that a “Display” tab of the Screen Resolution window opens on the screen.
- Adjust Screen Resolution:
You now have to select the resolution you prefer on the Display tab from the drop-down menu. In order to adjust the text size, you need to use the slider. Also, you can adjust the icon size using the slider.
- Apply Changes:
After adjusting the necessary things, your job is to tap on the “Apply” button to save your changes. Now you can find that the resolution has changed.
Scan For Malware:
Ensure that you check the external software properly for any malware. So you have to uninstall every software you have installed recently. If any of the software is not malware, it may happen that the external software settings are interfering with the display settings of your computer.
Update Your PC’s OS:
Developers have recently pushed a new update to the operating system to resolve bug-related problems. The steps you have to follow to update the operating system are as follows:
- Your first task is to navigate to Settings. Then, you need to select System.
- Now, your job is to tap on Windows Update.
- After that, you have to select the Download and Install option, which can be found beside a pending update. If there does not exist any pending update, you need to tap on Check for updates.
Check The Refresh Rate Of Your Monitor:
A display’s refresh rate indicates the number of times the image refreshes in each second on the screen. You must synchronize this with the video card for the picture that you are going to view. If they aren’t synchronized, the images will create other display faults. Suppose you see that the refresh rate has not synced with the video card. In that case, you can experience display issues. These are the steps you need to follow to change it.
- First, you need to navigate to Settings. Then, your task is to select the System.
- Now, you need to select Display.
- After that, you have to tap on Advanced Display.
- Next, your task is to tap on the dropdown menu for the refresh rate.
- Finally, your task is to choose the right refresh rate.
Install All the Latest System Updates:
You can find some system specifications contradictory to the old software. In order to fix the problem, you have to update and install the most recent updates to the OS and computer. This process can assist in resolving the trouble automatically with the PC screen.
Update Graphics Driver:
If your drivers are outdated, you can experience different errors such as the Esc key not working, the Graphics Device Driver Error Code 43, the MHW graphics device getting crashed, etc. This driver can also cause the horizontal lines on the computer screen problem. If it happens, then you need to update the graphics driver. The steps that you have to follow to get the job done are:
- Your first job is to open Run Window by hitting Windows and R keys.
- Next, you have to input devmgmt.msc.
- Now, your job is to open Device Manager by pressing Enter. Alternatively, you can right-click the Windows icon.
- Then, you have to tap on the Device Manager option, which is located in the pop-up menu to open Device Manager.
- You now have to double-click Display Adapters to expand this.
- After that, your job is to right-click on the graphics driver from the drivers available in the list. Then, you need to tap on the Update driver.
- Once you see the next window, your task is to choose a driver update process according to your needs. Updating graphics drivers can be done both manually and automatically.
- Once you complete updating the driver, you can complete the process by following the instructions given on the screen.
Run Display Quality Troubleshooter:
It is the Windows in-built program enabling you to resolve the monitor horizontal lines. These are the steps you need to follow to run the troubleshooter.
- As soon as you open the Run window, your job is to type control. Then, you need to hit the Enter key.
- Now, you should change the View by as Large icons in the Control Panel. Then, you have to tap on Troubleshooting.
- After that, you need to tap on View All in the left pane.
- Next, you have to look for Display Quality from the available items you can see in the list.
- After that, you have to enter the admin password or you can give permissions if asked. In order to complete the task, finally you need to follow the on-screen instructions.
Perform A Clean Boot:
Performing a clean boot is one of the effective solutions you need to try to troubleshoot such issues. In the Clean boot process, you need to use a minimum set of drivers and startup programs to start Windows. This process helps to identify if any 3rd-party application is the culprit behind the problem.
- Your first task is to open the System Configuration (msconfig) window by typing “msconfig” in the Windows Search box. Then, you have to hit Enter.
- Once you open the System Configuration window, you need to tap on the “General” tab.
- After that, your task is to select the option “Selective startup”.
- Now, your job is to uncheck the checkbox named “Load startup items”.
- You now have to navigate to the “Services” tab. Then, you need to check the “Hide all Microsoft services” checkbox. Now, your job is to tap on the “Disable all” option.
- Next, you have to navigate to the “Startup” tab. Then, you have to tap on the “Open Task Manager” link. If you are in the Task Manager window, you need to disable every startup item.
- Finally, you have to save the necessary changes by tapping on “OK”, and then your job is to restart your computer.
Seek Professional Help:
After trying all these solutions, if you still see the horizontal lines on the screen, you need to seek professional help. In this case, you need to take the assistance of an expert technician who can help to troubleshoot the problem. Or you can get the support of your device’s manufacturer to fix the issue.
Additional Troubleshooting Tips to Fix Horizontal Lines on a Computer Screen:
- You can try to turn off and turn on your monitor. Although it looks like a normal troubleshooting process, it can help you to fix screen glitches like horizontal lines.
- If you want, you can try connecting another monitor to your computer and then check if the horizontal lines still exist. This process will help you to determine if the problem you are facing is with the monitor or the computer.
- It is better to check if there is a loose connection inside your monitor. When you open the monitor, you need to check if there are any loose connections or any damaged components. You have to be cautious because the warranty can be void after the monitor is opened.
- If you experience the problem even after changing settings, you need to reset the monitor to its factory defaults.
- You can find in-built diagnostics tools in a few monitors. These hardware diagnostics help to identify hardware problems.
- Detaching and reattaching the keyboard can be an effective solution you should try. If your computer has a removable keyboard, you can try to reseat this for a few seconds and then check if the problem is fixed.
- You can try to close your laptop and reopen it slowly. You need to check when the lines are appearing on the screen after you open the laptop. If you see the lines appearing at a certain angle, damaged wiring may be the culprit.
- You need to check if Instant Replay is enabled. If so, then you have to disable this. Some users said that disabling the feature helped to troubleshoot this issue. Or you can change its storage destination to an SSD rather than to a traditional HDD. You can find the option in the app’s Recording settings.
- Ensure that you are not keeping other electronic or magnetic devices near the computer or screen or the connecting cables. The reason is that these can interfere with the connection.
- Calibrating a monitor is a process you can try. It takes only a few minutes.
- Ensure that you are using your laptop on a hard surface. If you use it on a tablecloth, a blanket, or any soft surface, you can experience overheating issues. As a result, you can experience screen flickering and lines.
- You have to reset the monitor to its factory settings. If you use an external screen, ensure that you use the external screen’s built-in settings instead of your computers. Accessing these settings is possible through a physical Settings or Menu button that can be seen on the monitor.
- If none of the above-mentioned tips work or if the issue doesn’t get fixed even after taking help from a professional, you may need to buy a whole new device.
The Bottom Line:
Horizontal lines on a computer screen can be really very frustrating. To fix the issue, it is important to understand the reasons behind it. In this article, we have mentioned several solutions that you can try to fix horizontal lines on a computer screen. If still the issue persists, you can take help from a professional.